
Dining Tables
DINING TABLES
Scroll down to find your dining table in the column on the left, then click on the appropriate table tab to view your assembly instructions.
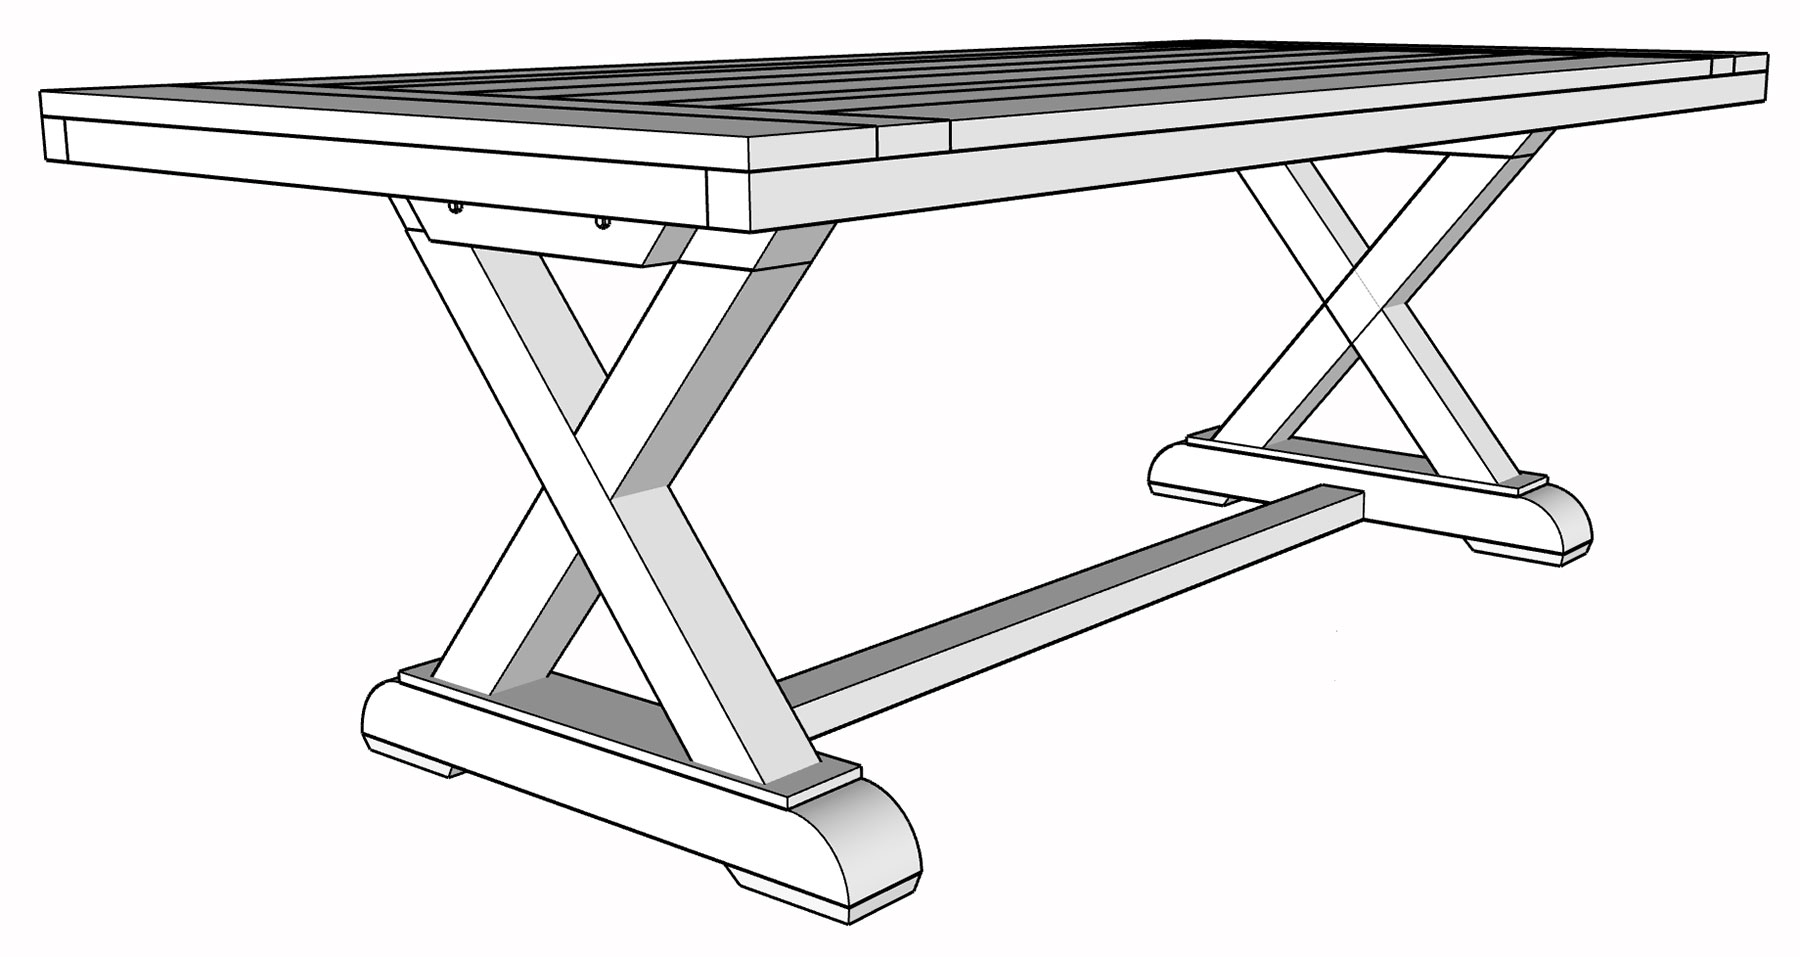
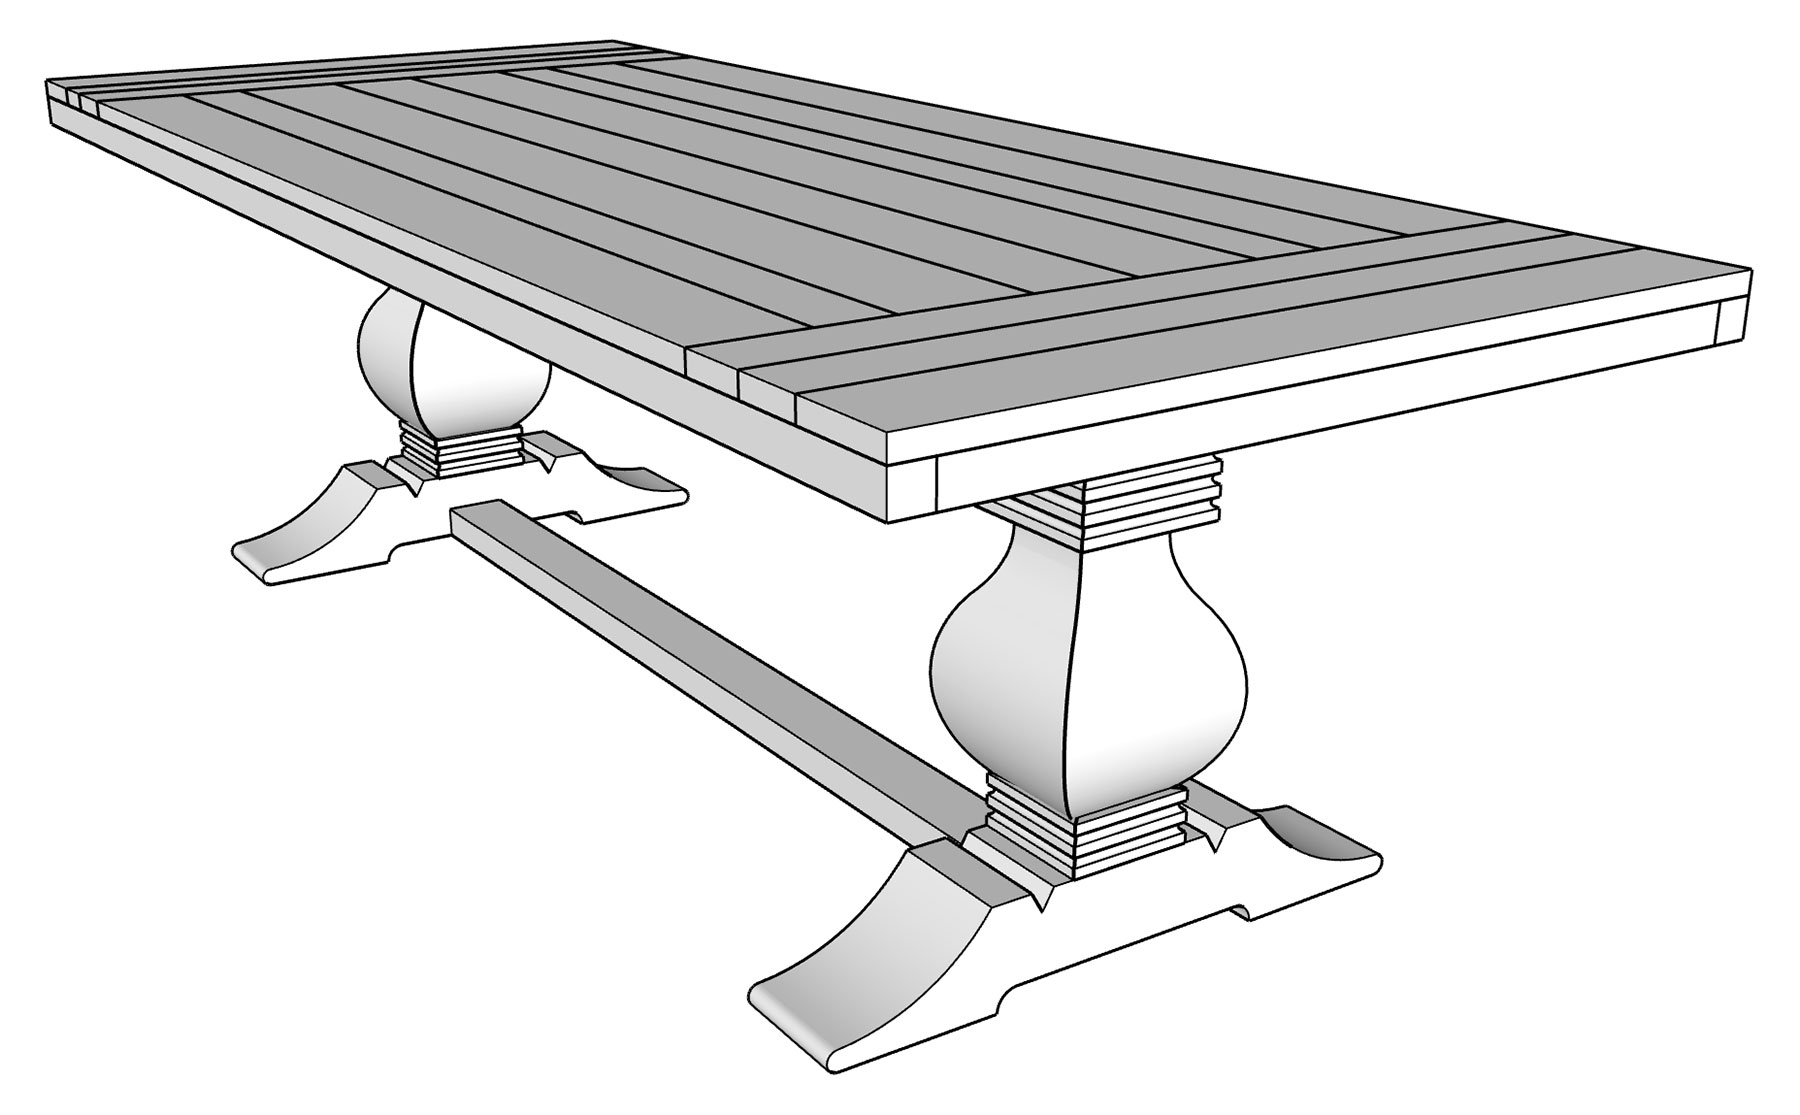
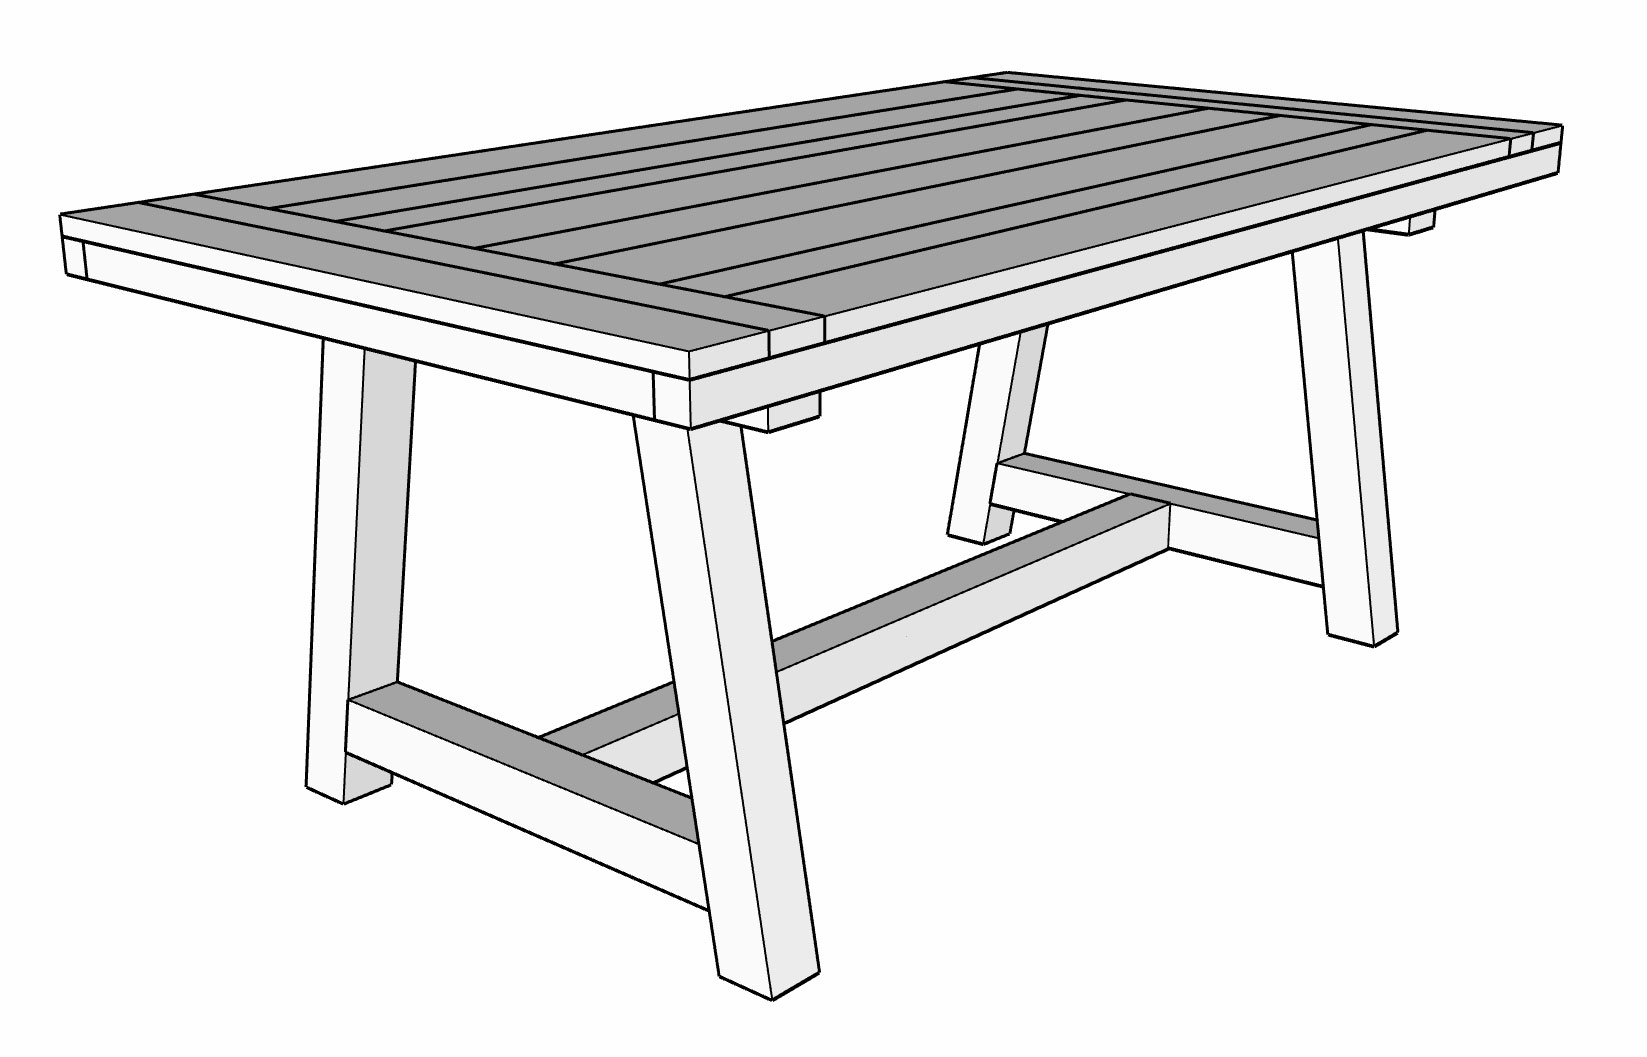
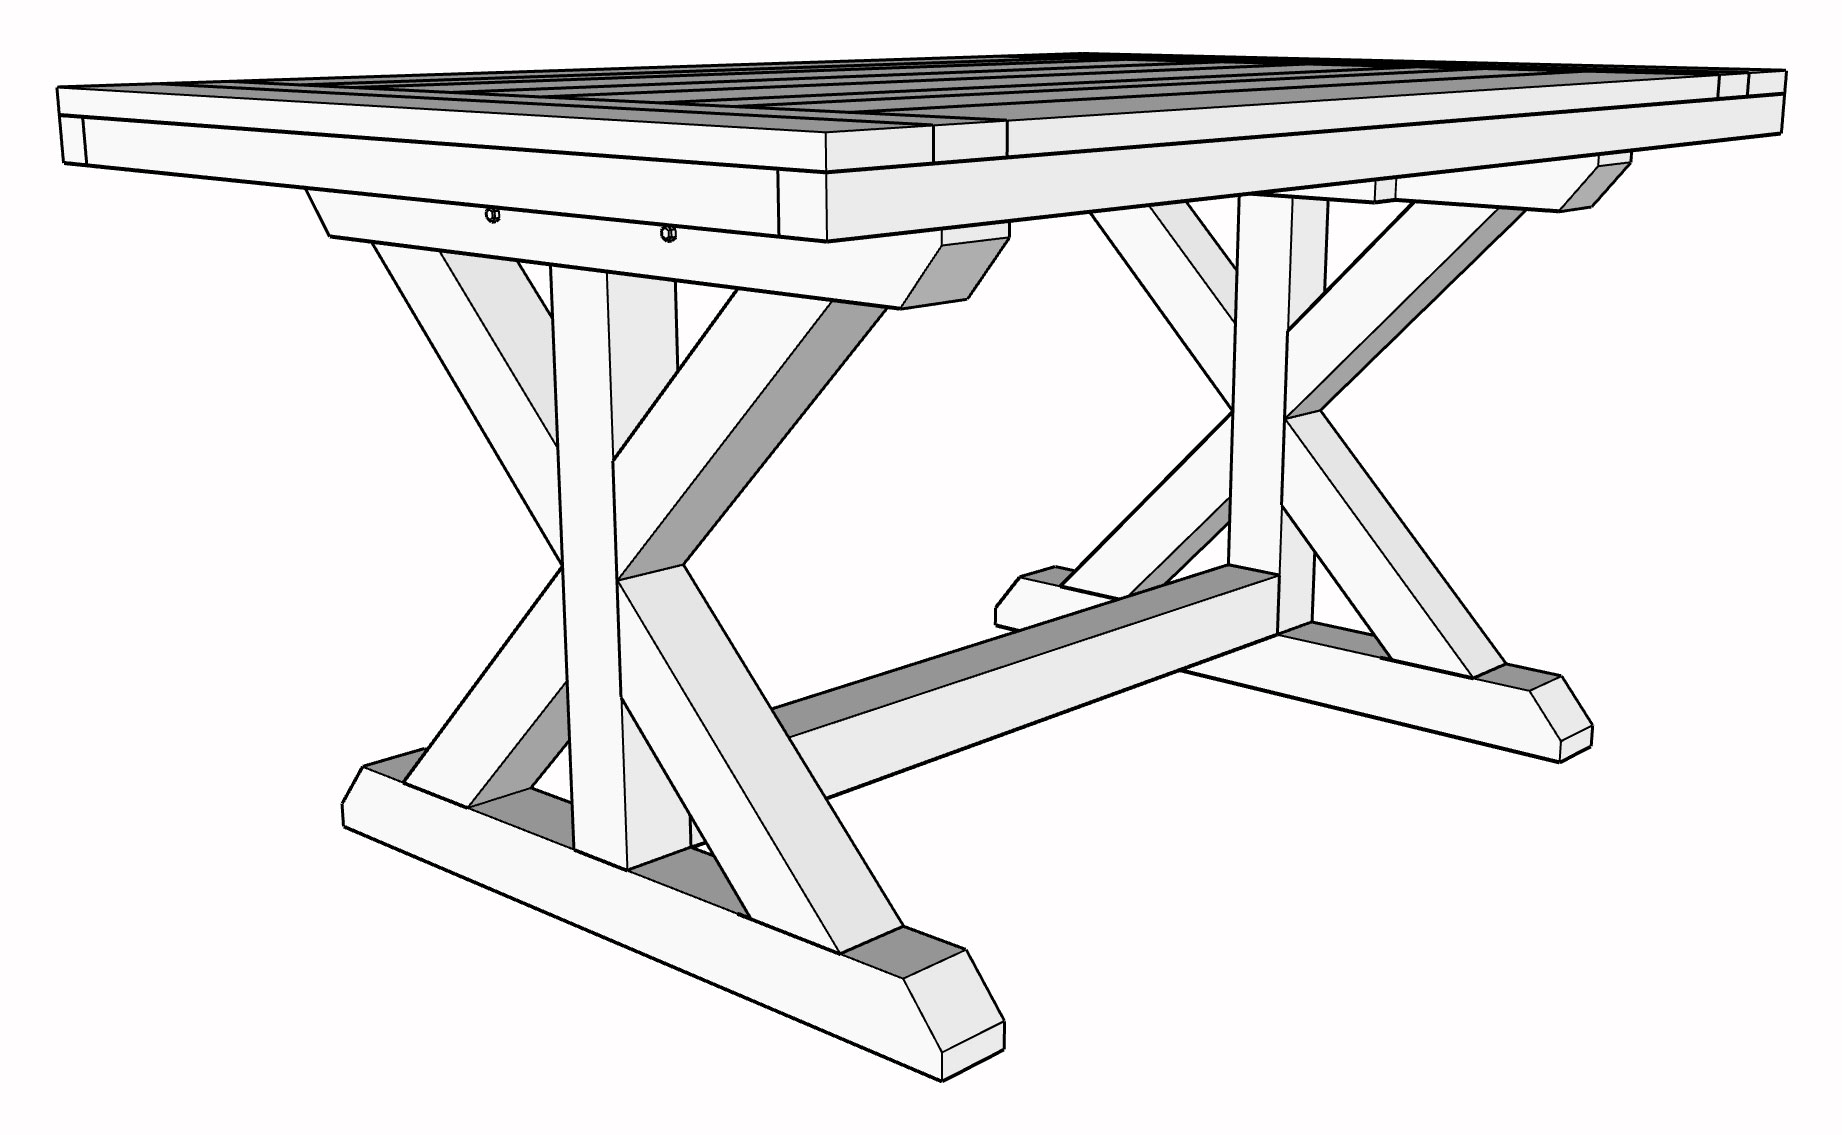
The Fulton Trestle
To get started you will need a 5/8" socket wrench for the bolts and 11/16" wrench (or an adjustable wrench) for the nuts. You should have four 6" bolts, washers, and nuts.
If your furniture is being shipped, you will find all your bolts for your table in a burlap pouch along with your Experience Kit (bag with logo) located inside the box for your table legs.
Keeping the cardboard on the table top for protection, place your top down (bottom facing up) on your floor. Then remove the protective cardboard guards on both the leg braces that you see secured by the bolts.
Furniture pieces are marked A and B
Your legs, beam and table top are marked A and B. All pieces marked A go on one side of the table and all pieces marked B go on the other.
Note: You will find the A and B markings on the top of the legs, on both beam pegs, and on the underside of your table top.
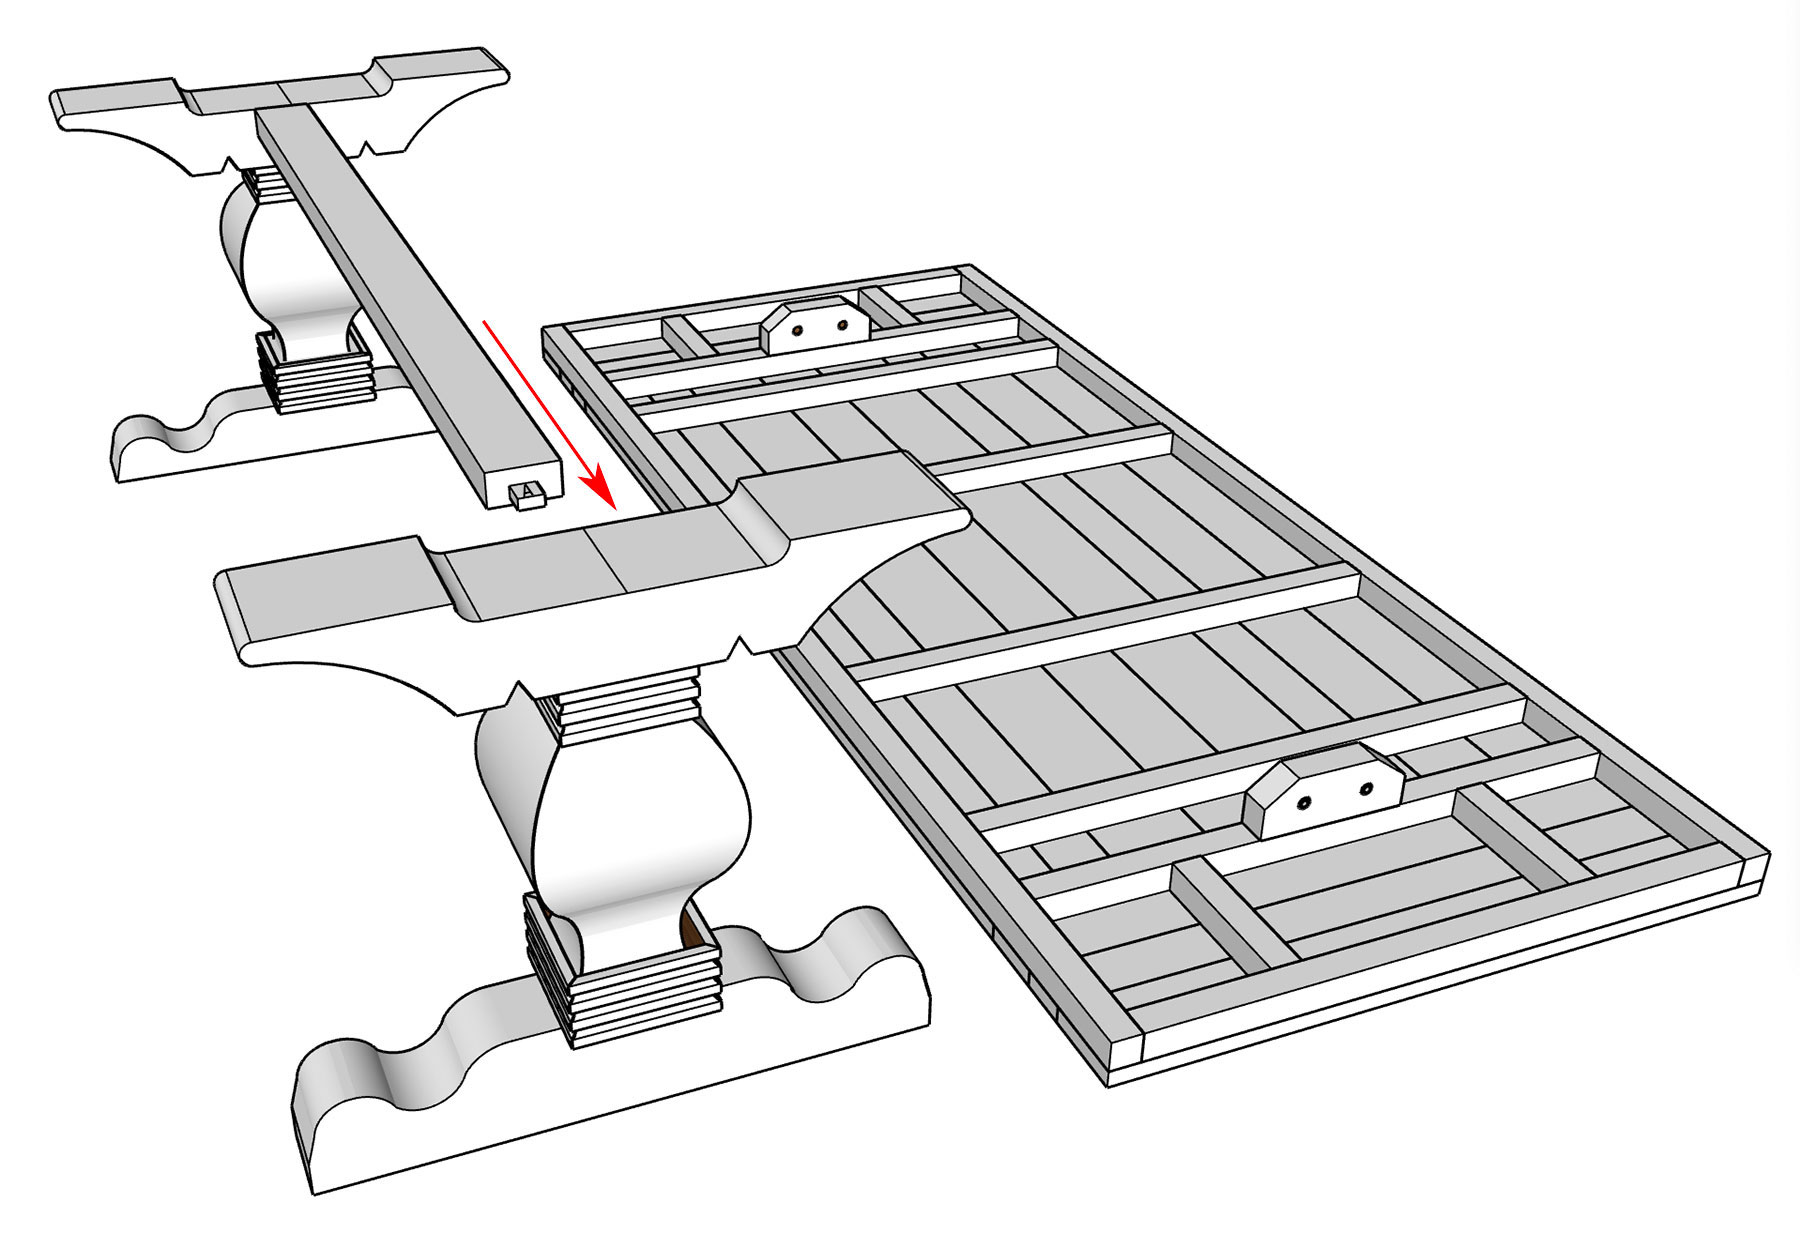
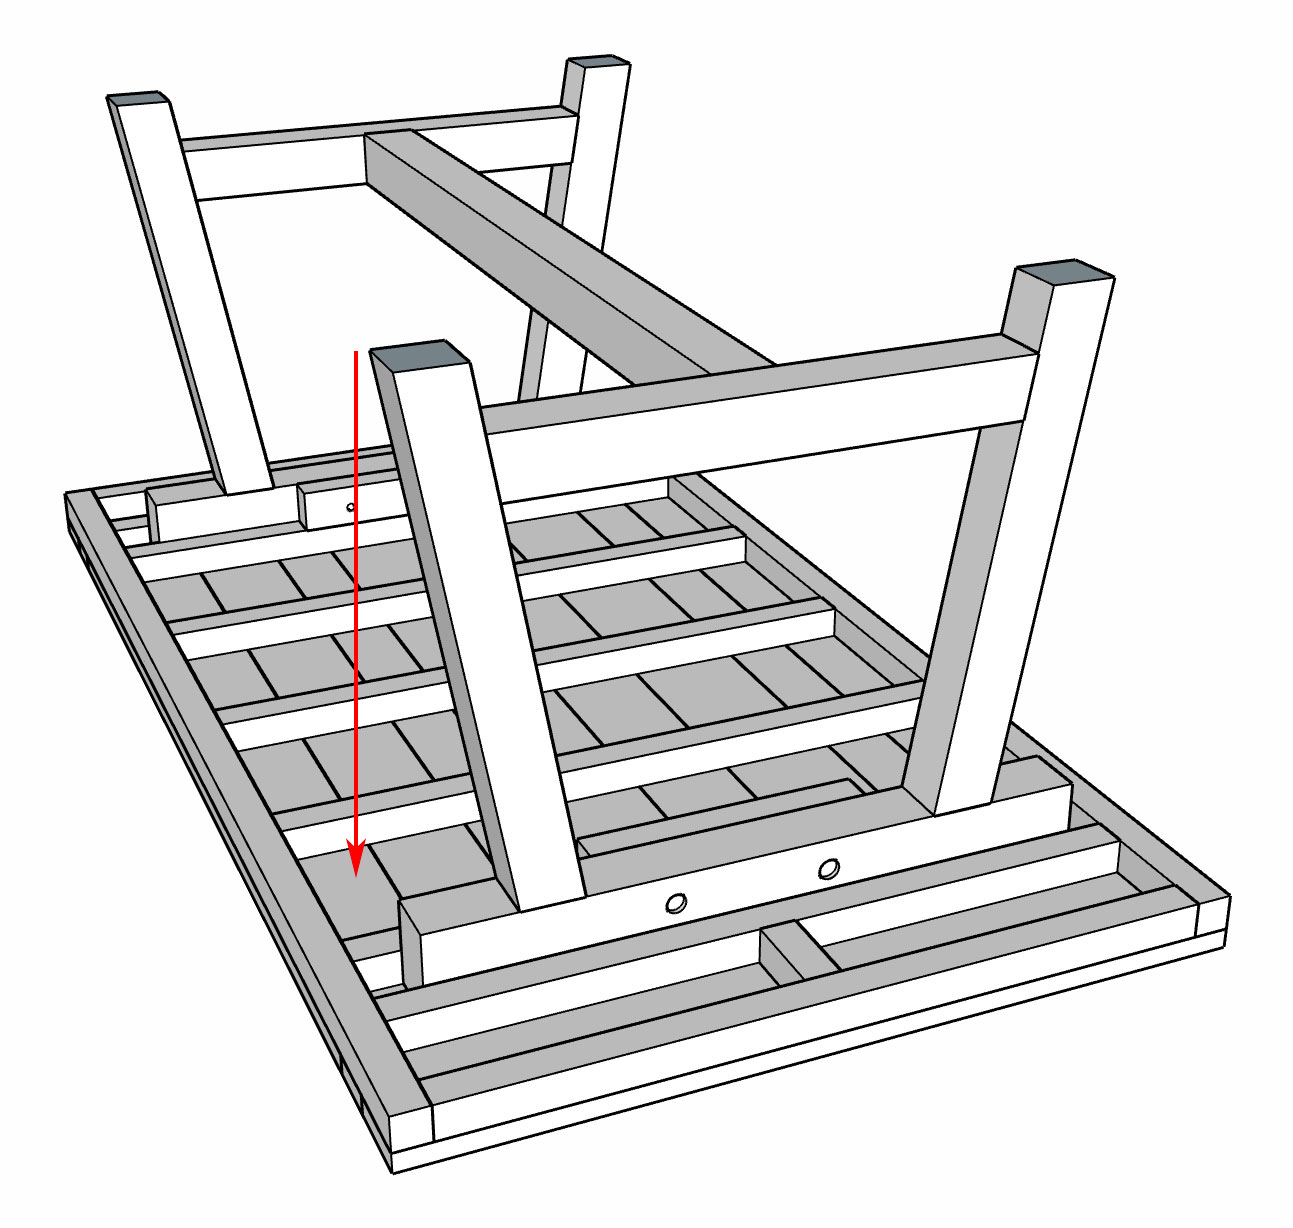
Step 1. Attach your beam between the legs
Place the legs and table top next to each other on the floor. With a person on each side holding up a table leg, lift your center beam and slide one end of the beam peg into the leg hole. Then do the other. Make sure to hold the beam completely horizontal so that the pegs go into the holes. It might be a slightly tight fit so you might need to apply pressure to the side of the leg to connect the two and close any gaps.
Make sure the A and B markings on the beam pegs are facing up before attaching to the legs. Then hold the beam completely horizontal so that the pegs go into the leg holes.
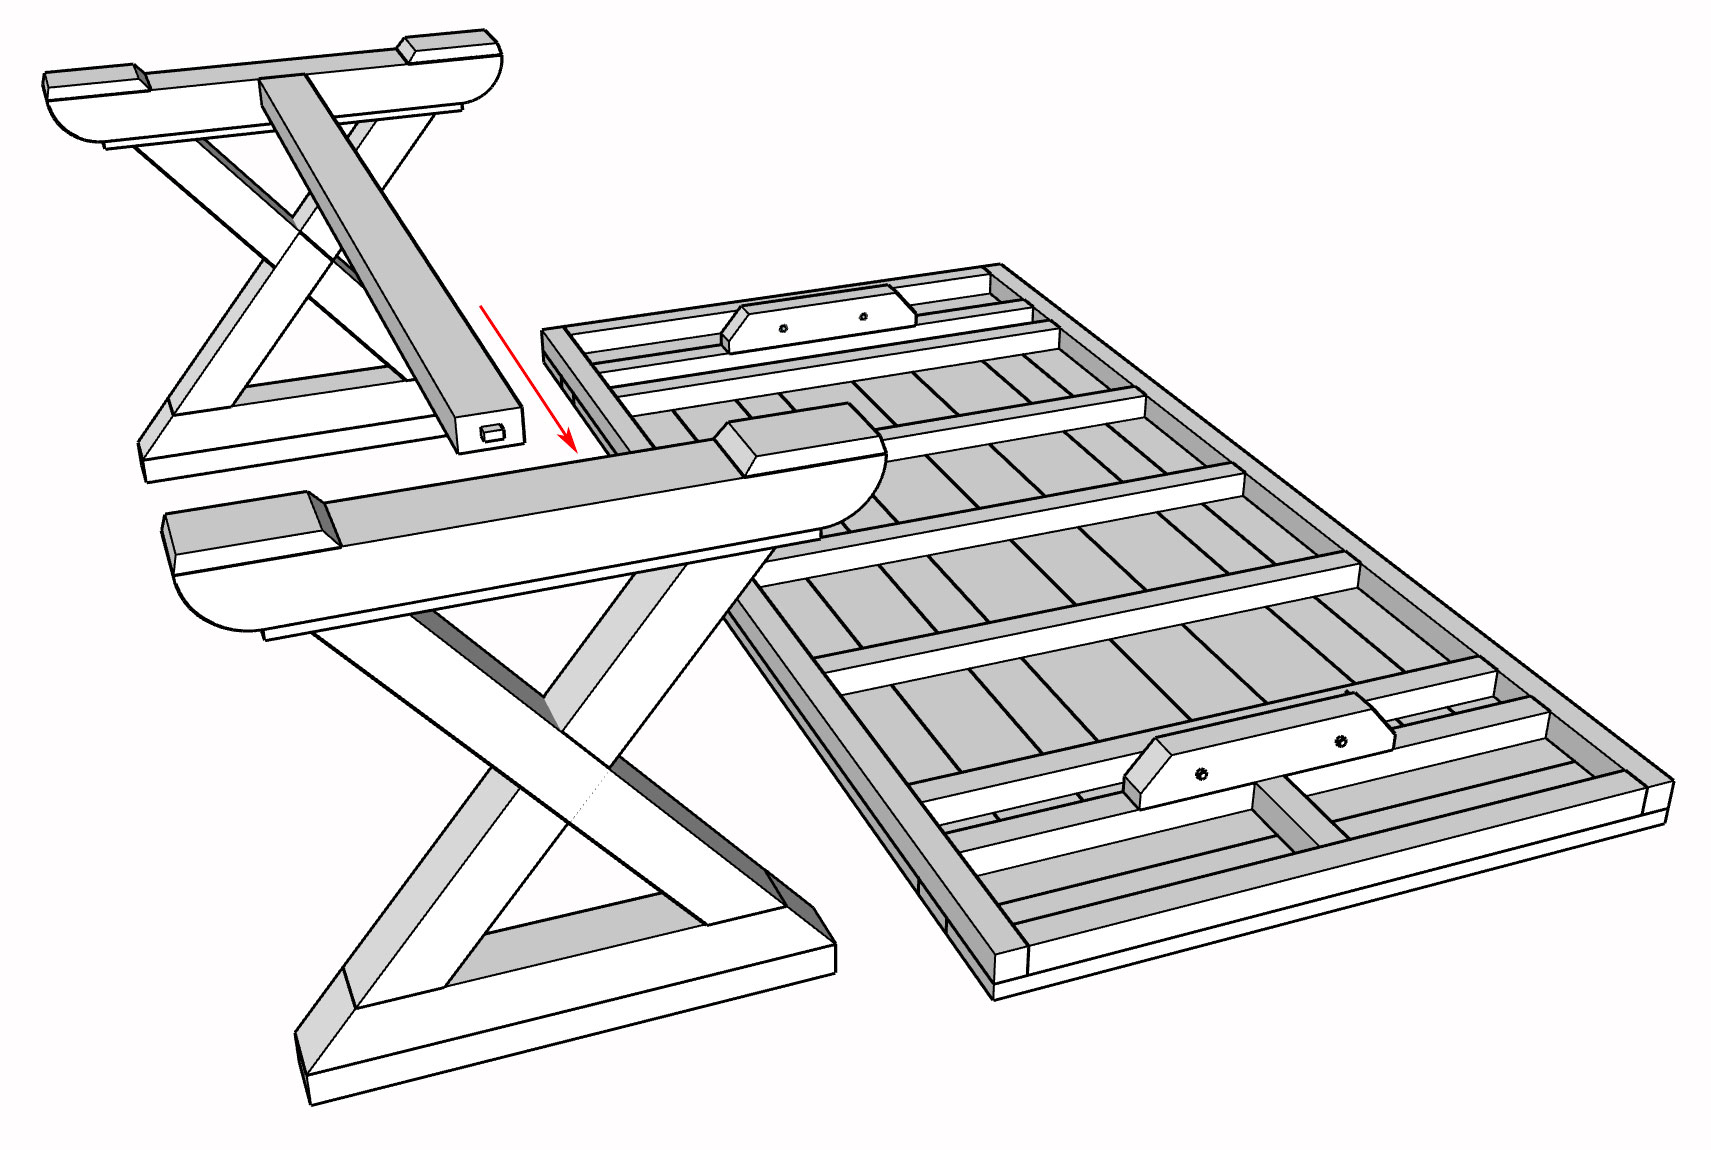
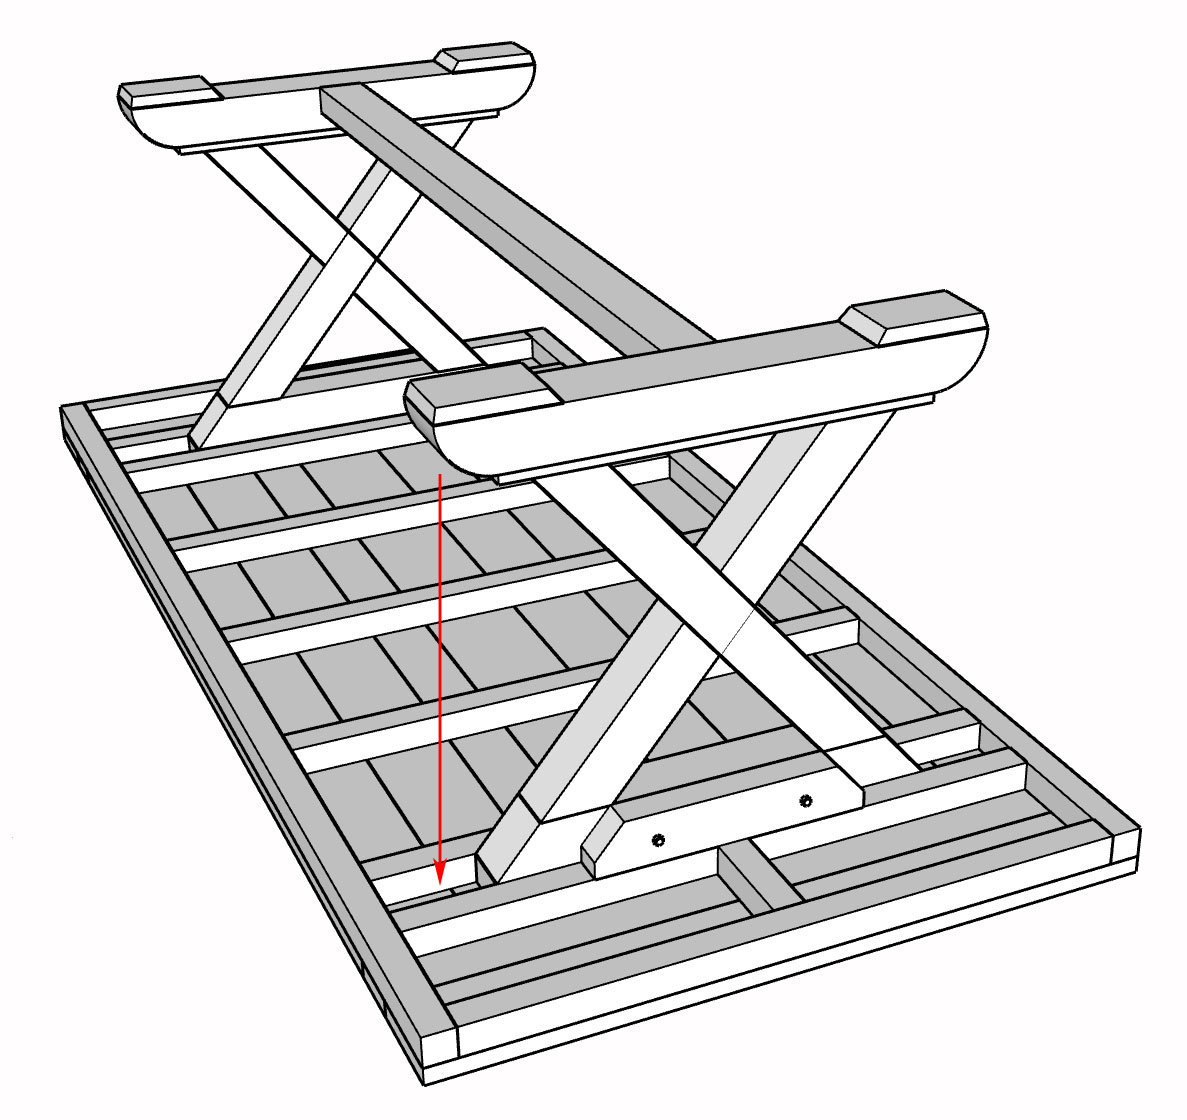
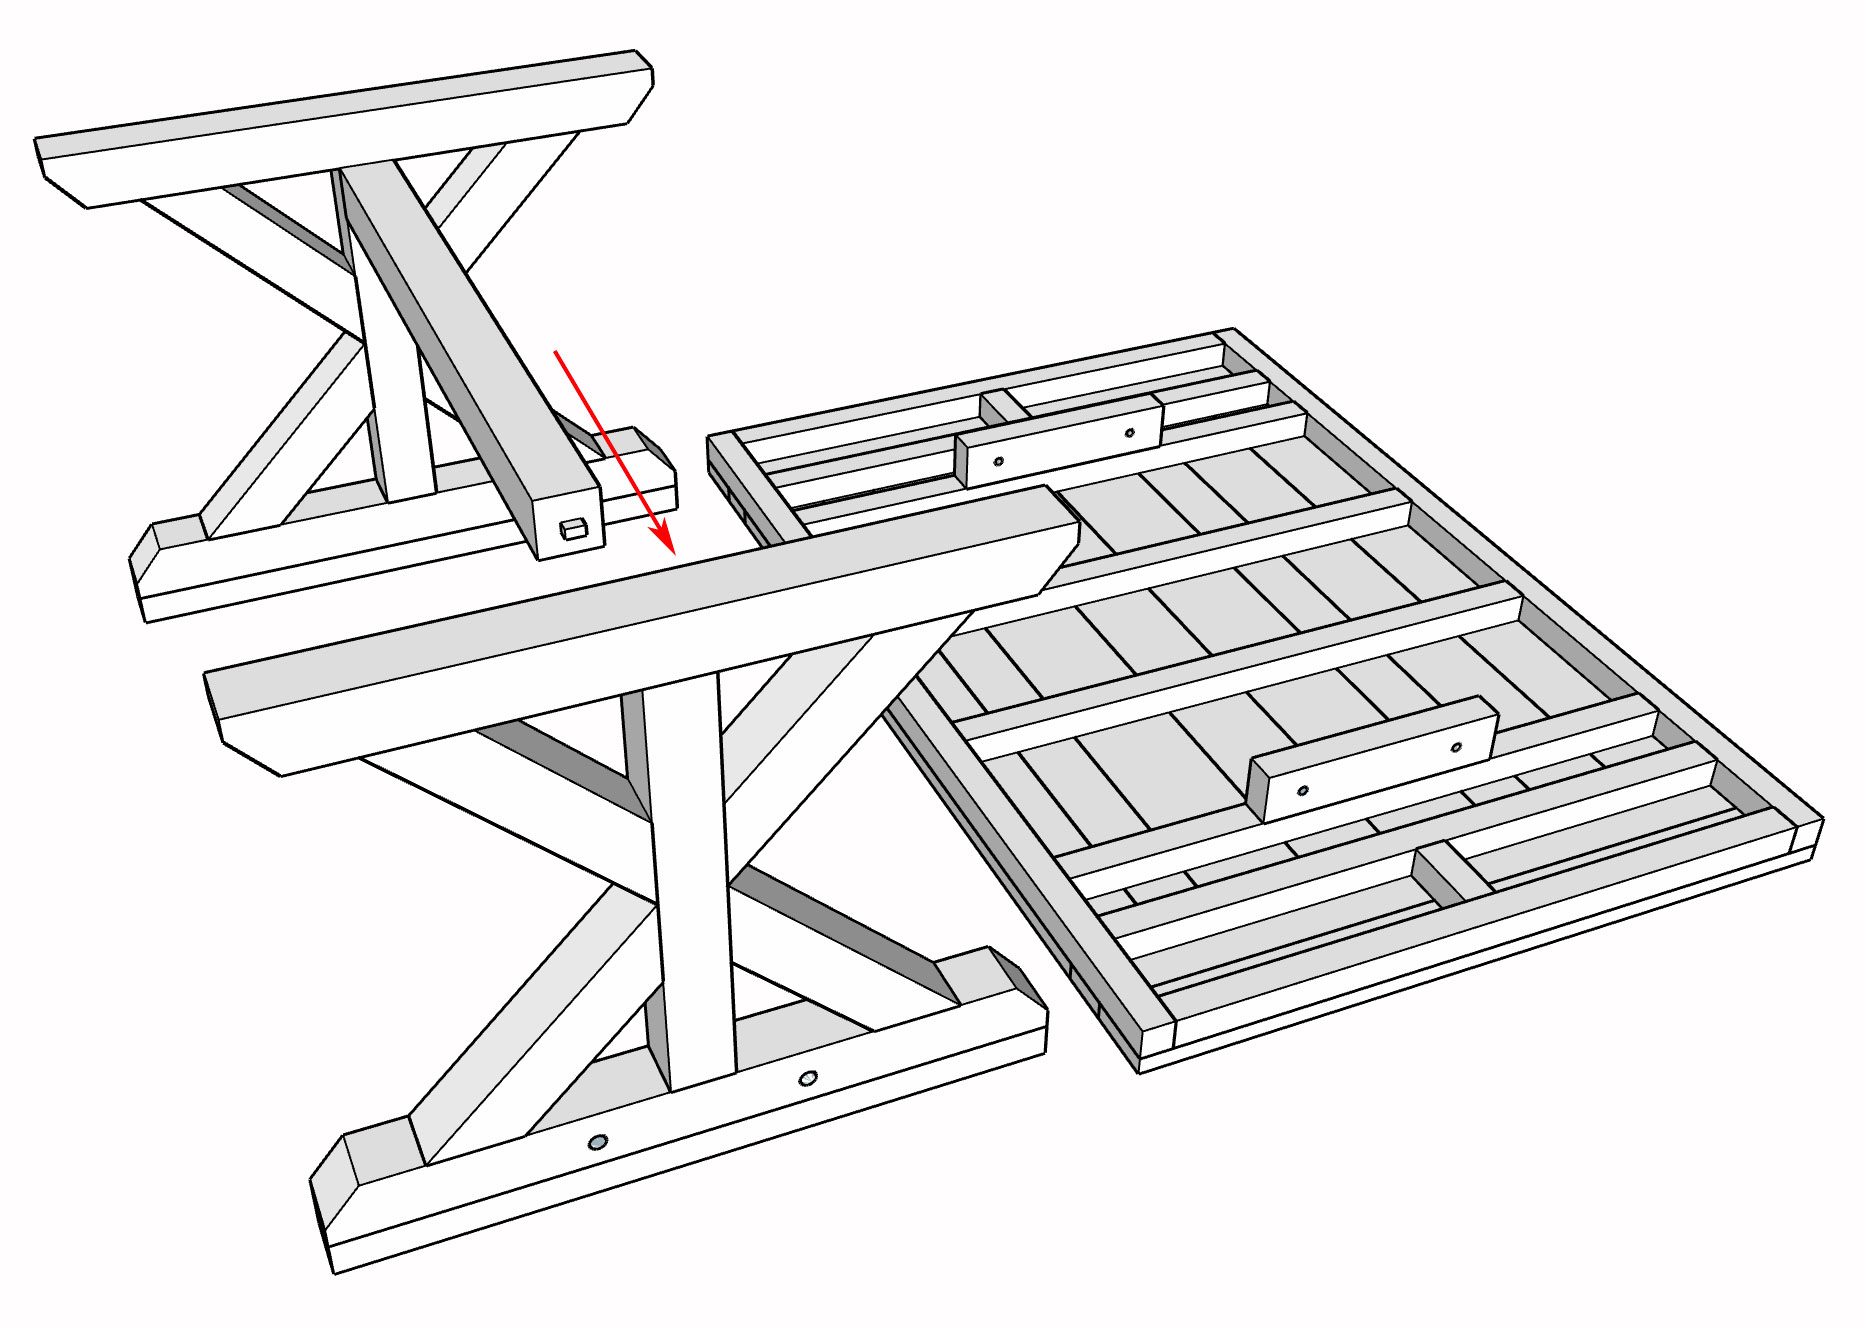
Step 2. Lower the legs down onto your table top
Then with a person on each end, carefully lift the connected legs with beam (keeping pressure on both ends, so the beam doesn't slide off the legs) and walk over to your table top and lower both legs down at the same time between the slots on your table top.
Lower both legs down at the same time.
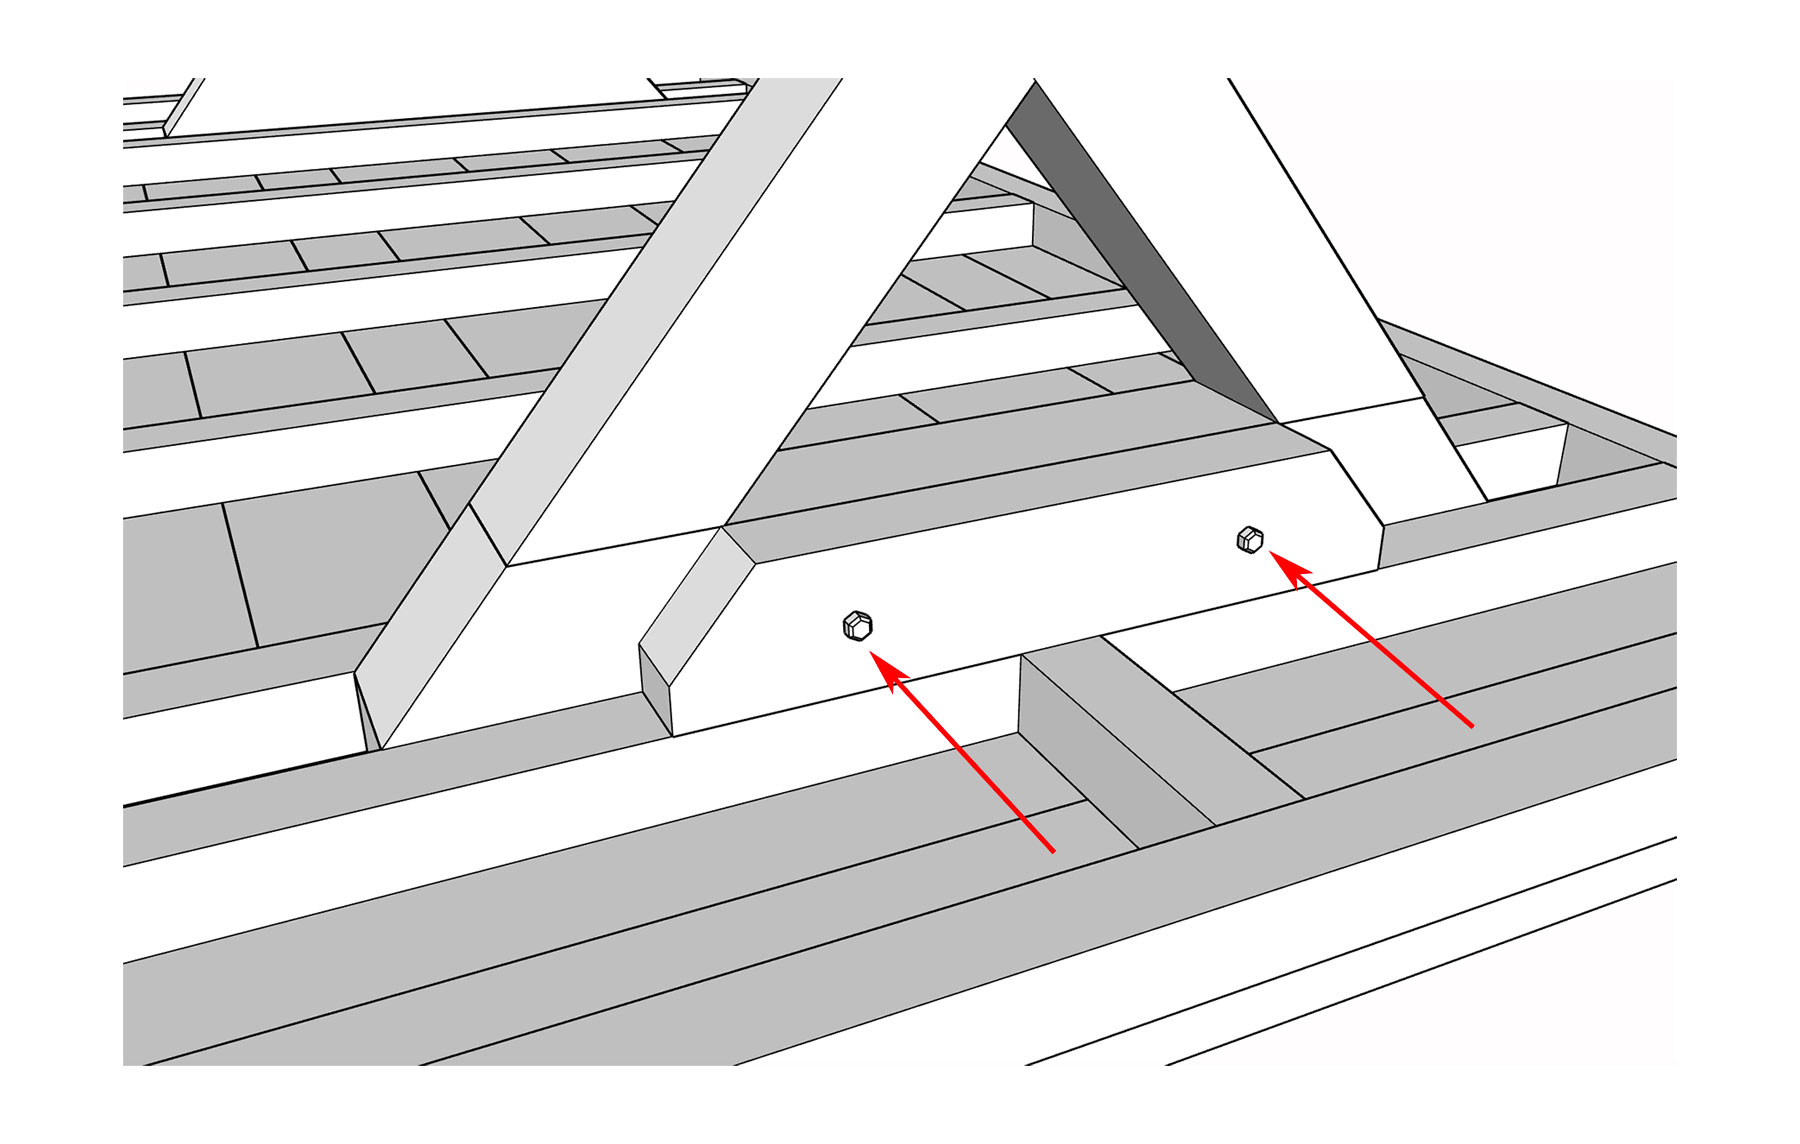
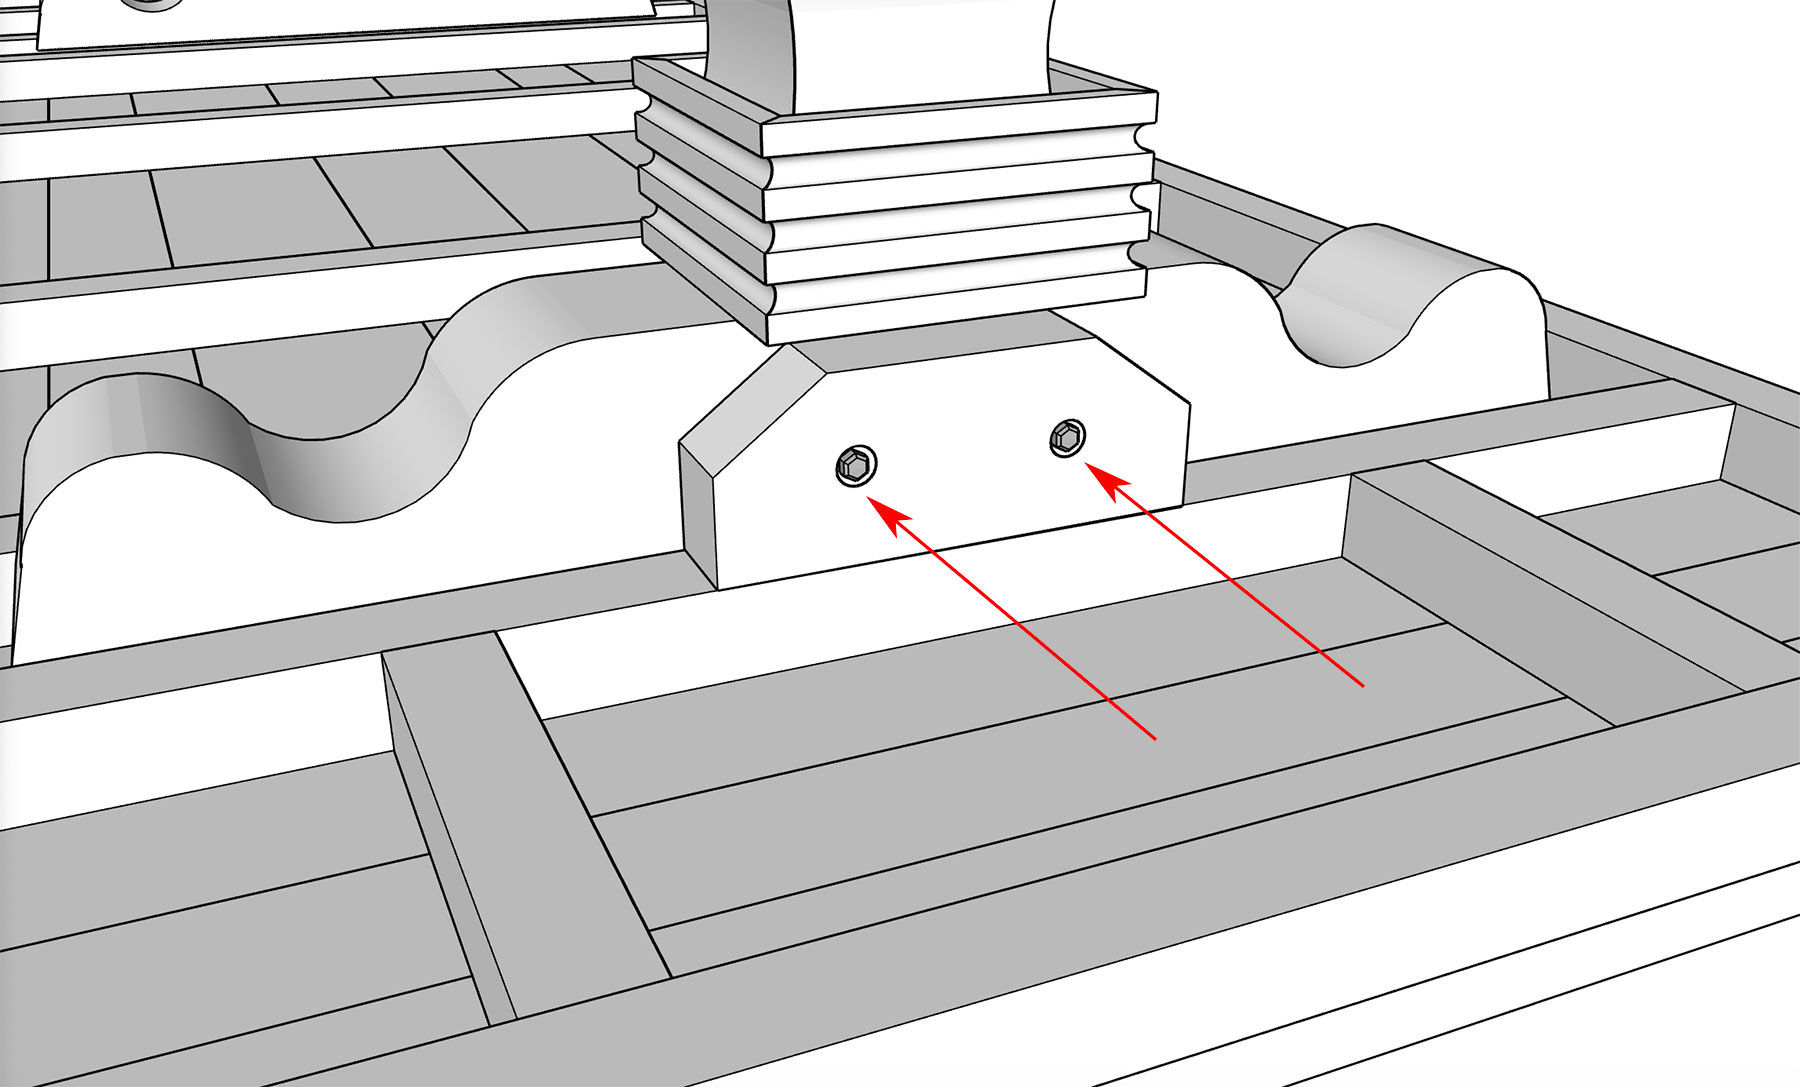
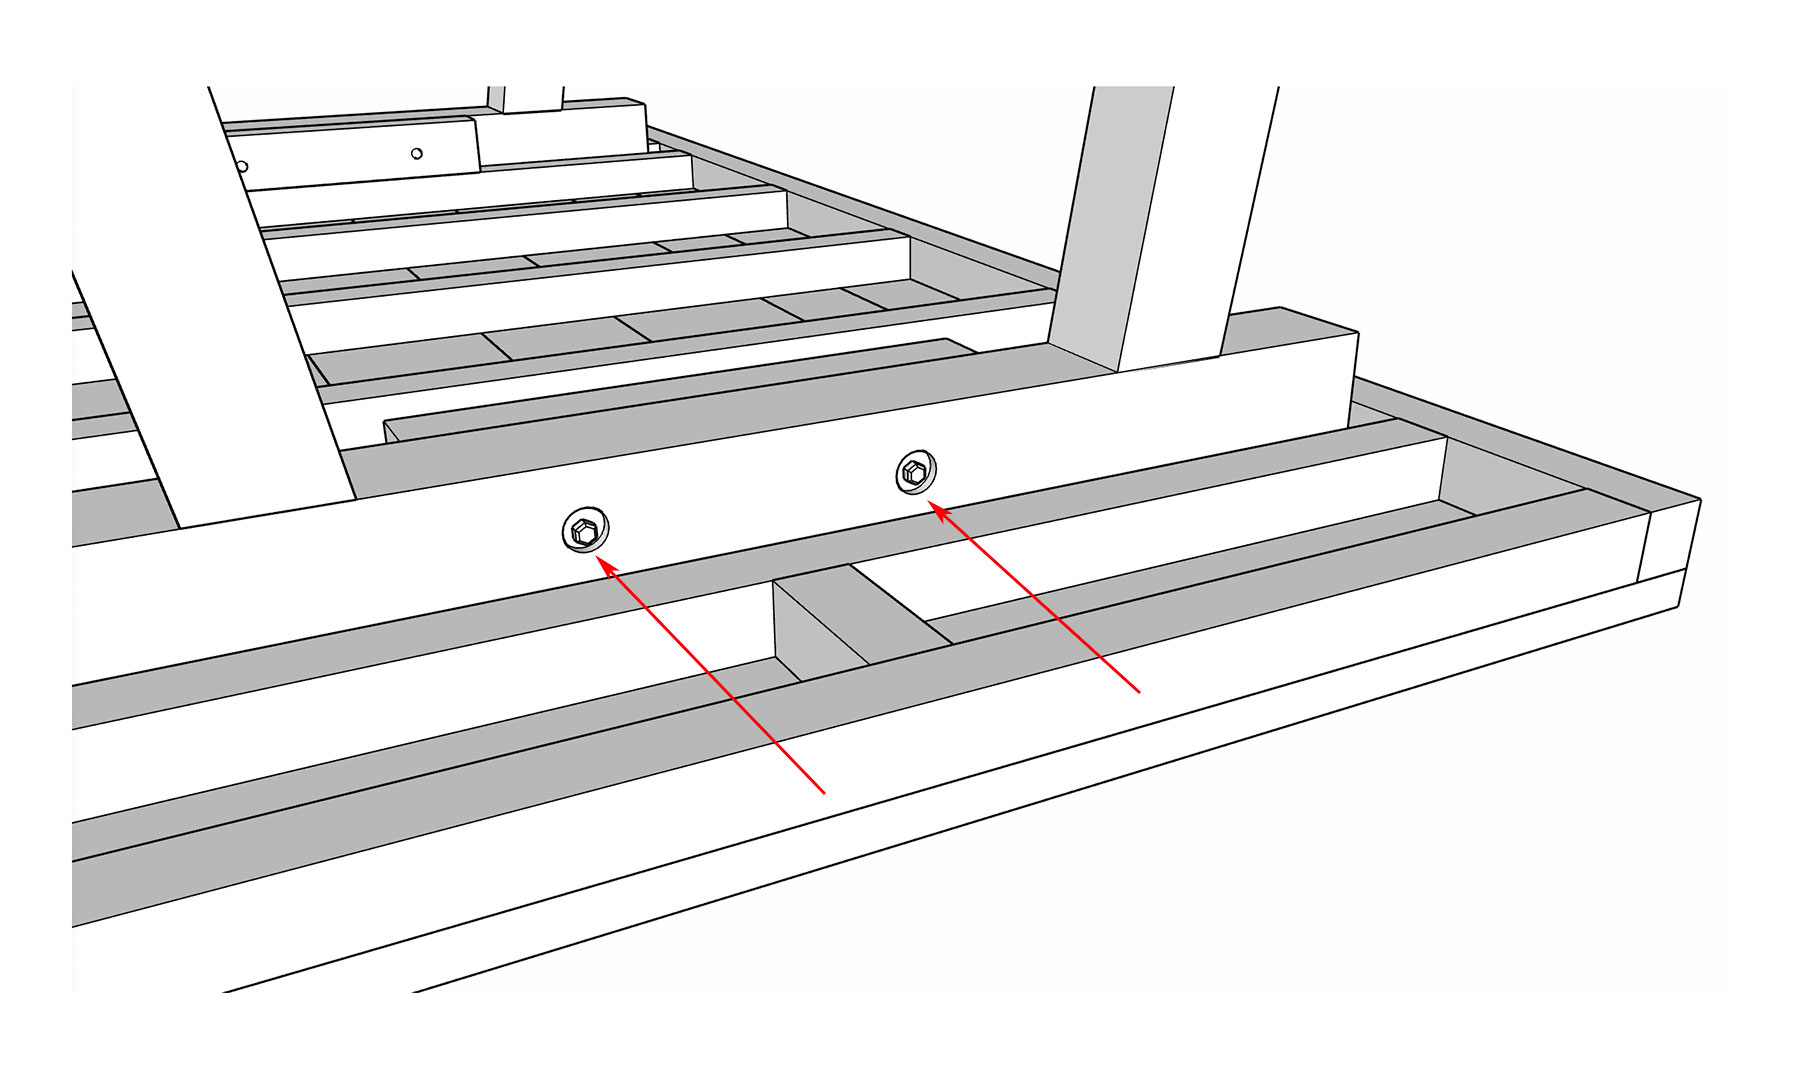
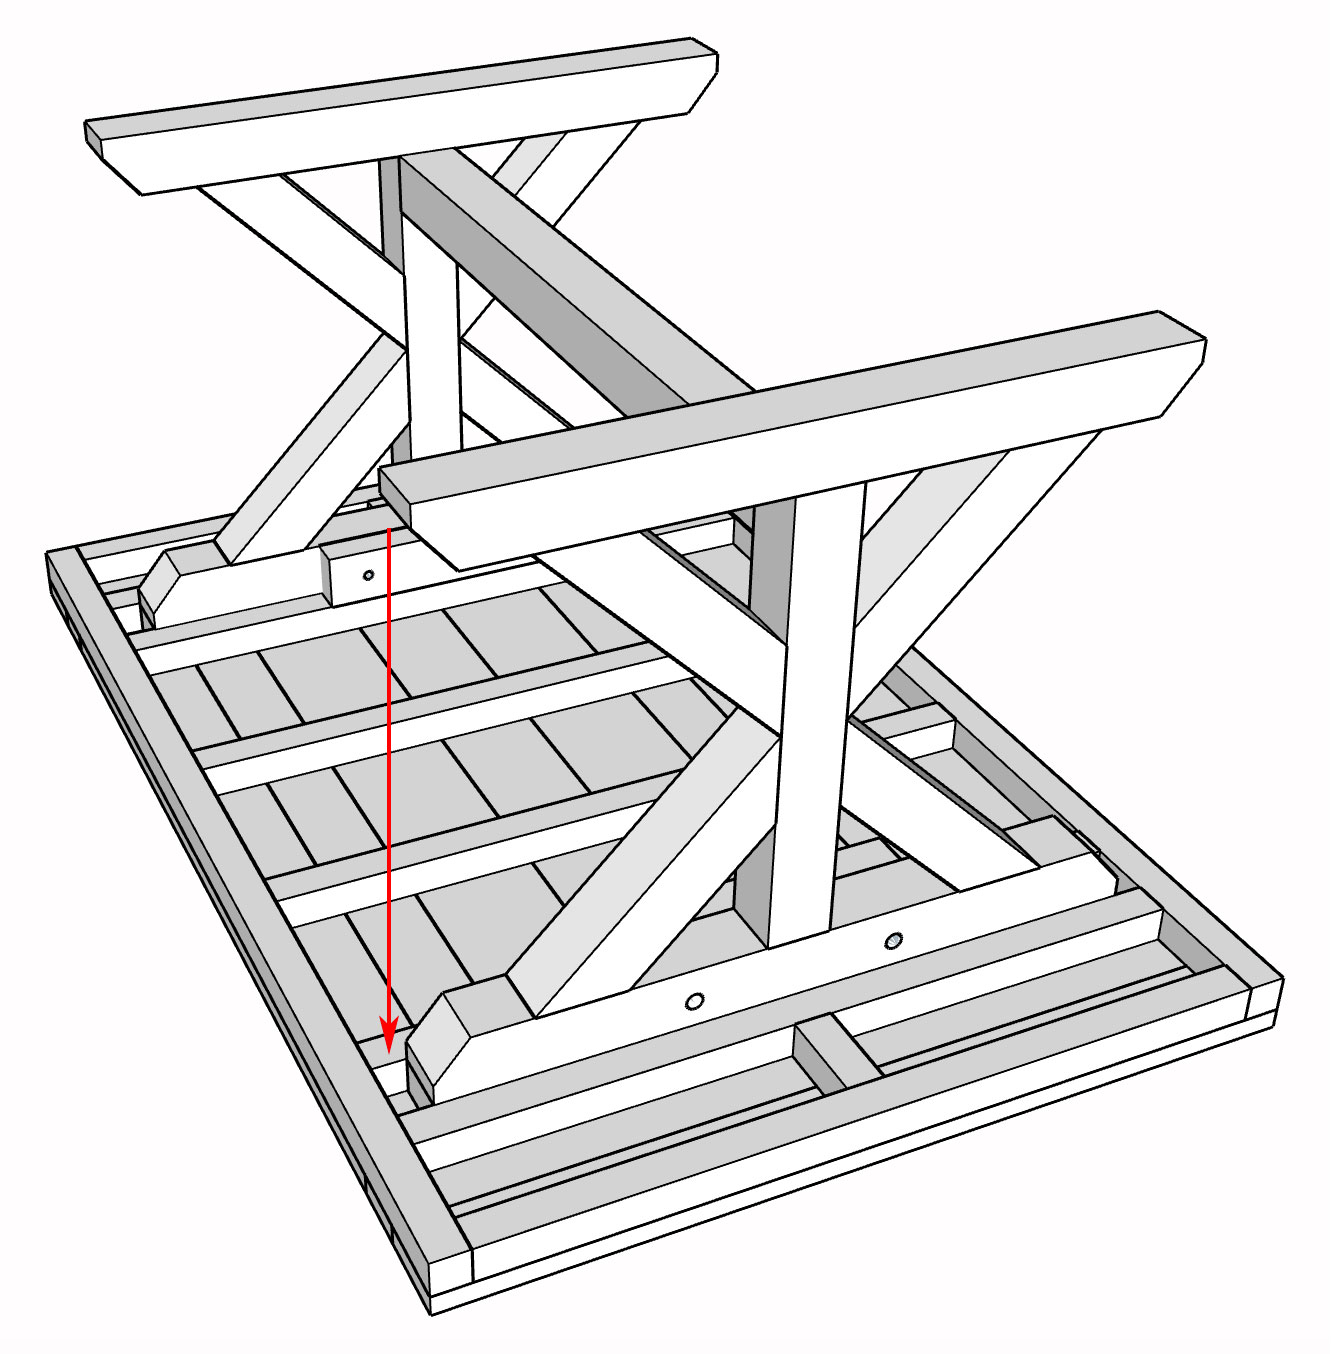
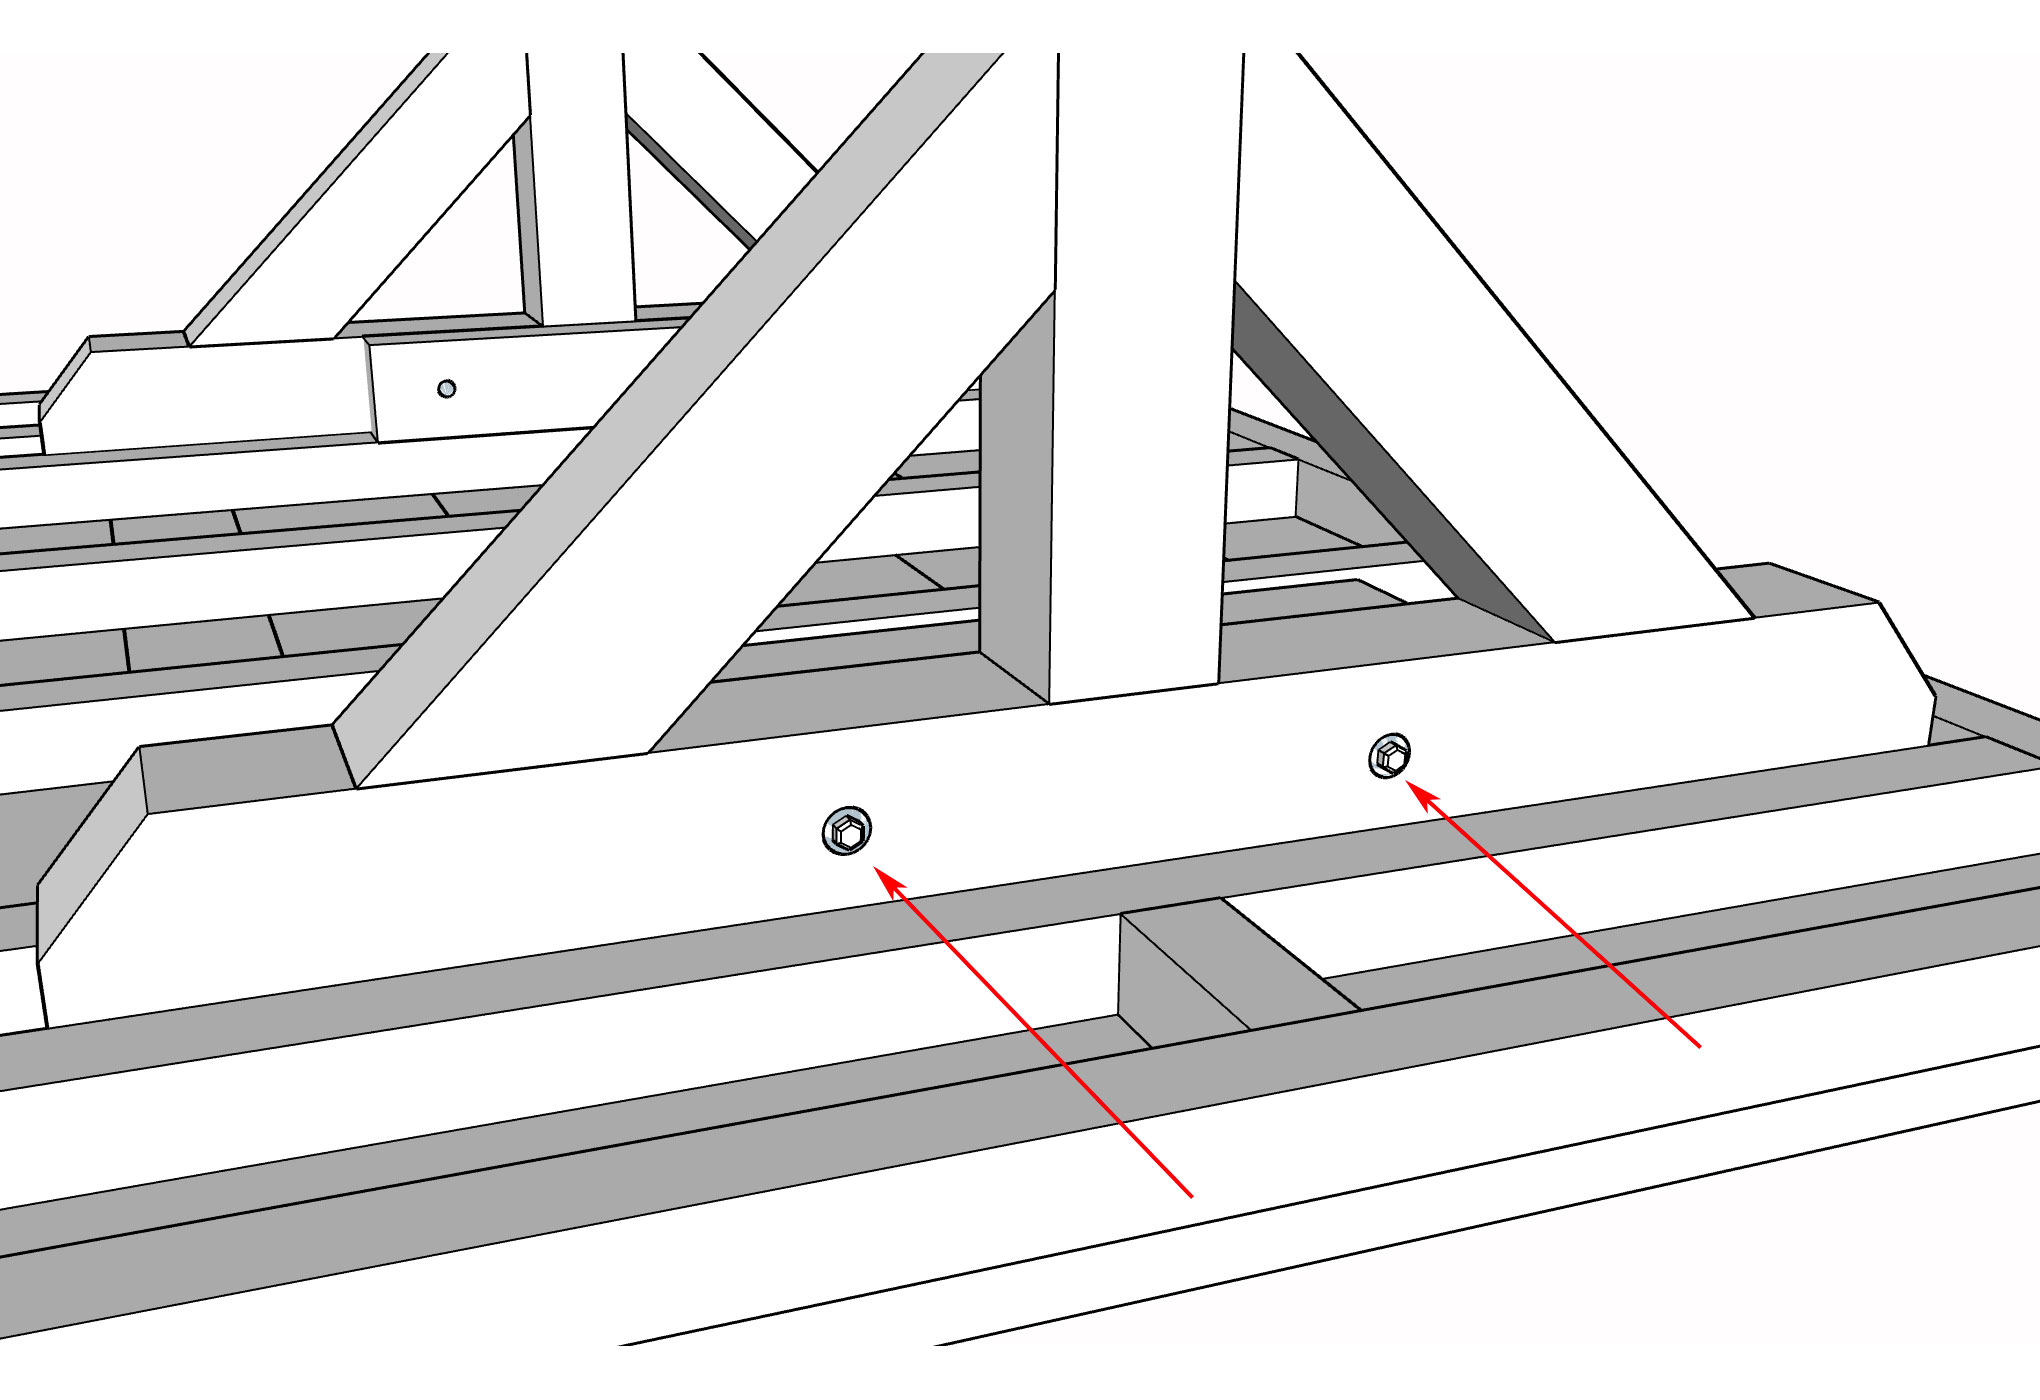
Step 3. Insert your bolts
Align the legs with the holes and slide in the bolts (we've added pre-marked lines to help you align the legs). On the other side add the washers and nuts. Hand tighten all the bolts first then use a 5/8" socket and wrench to tighten all the bolts.
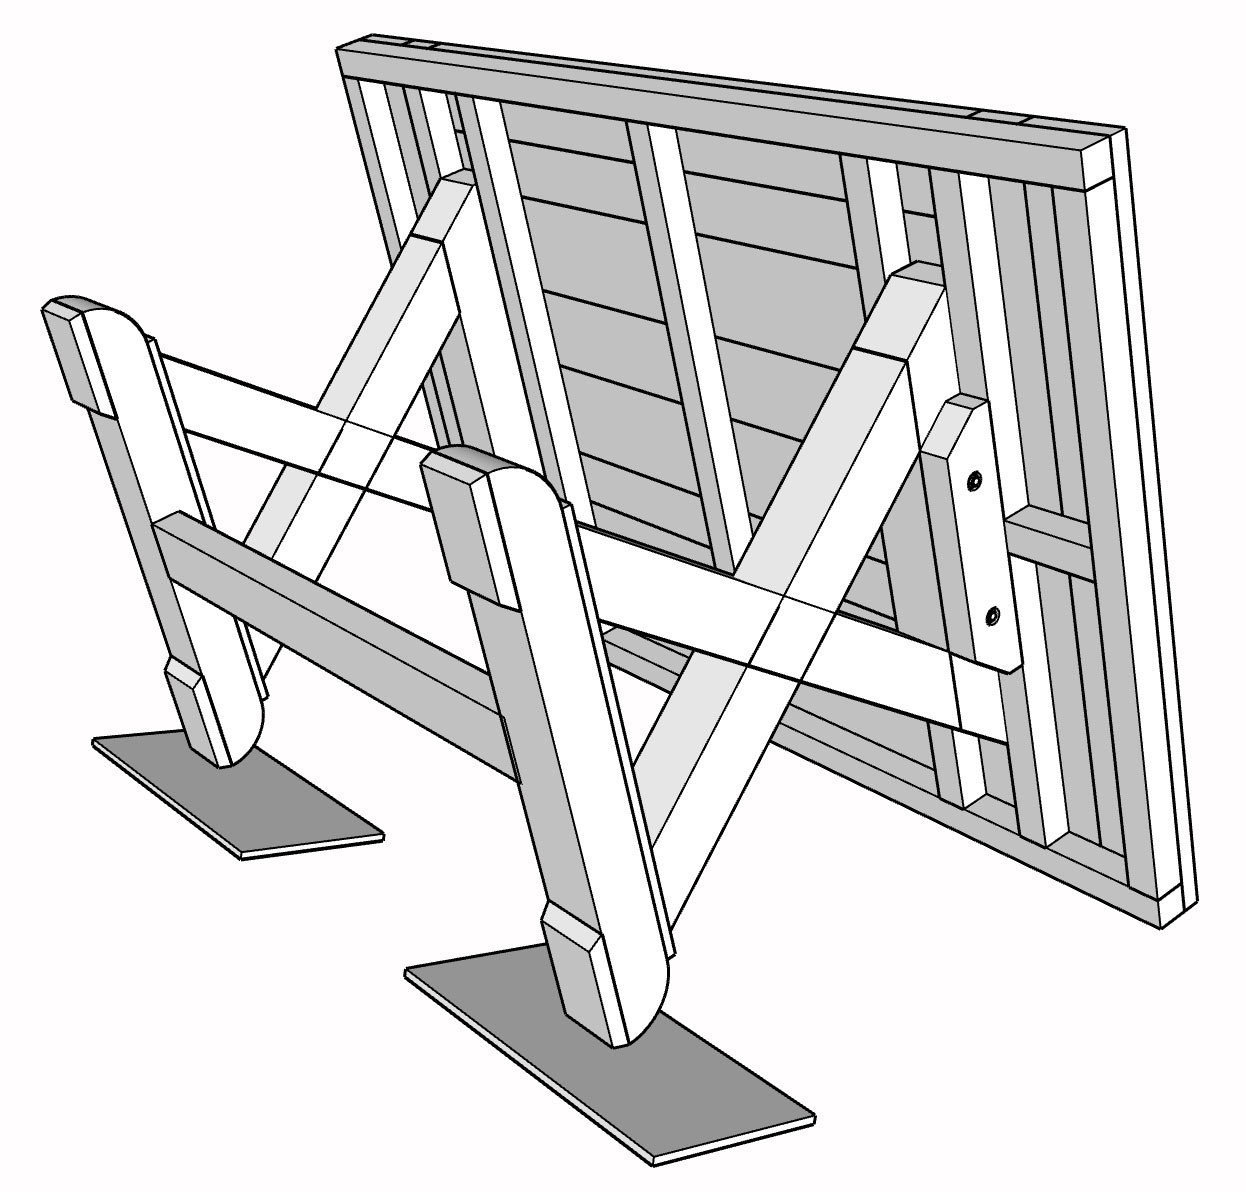
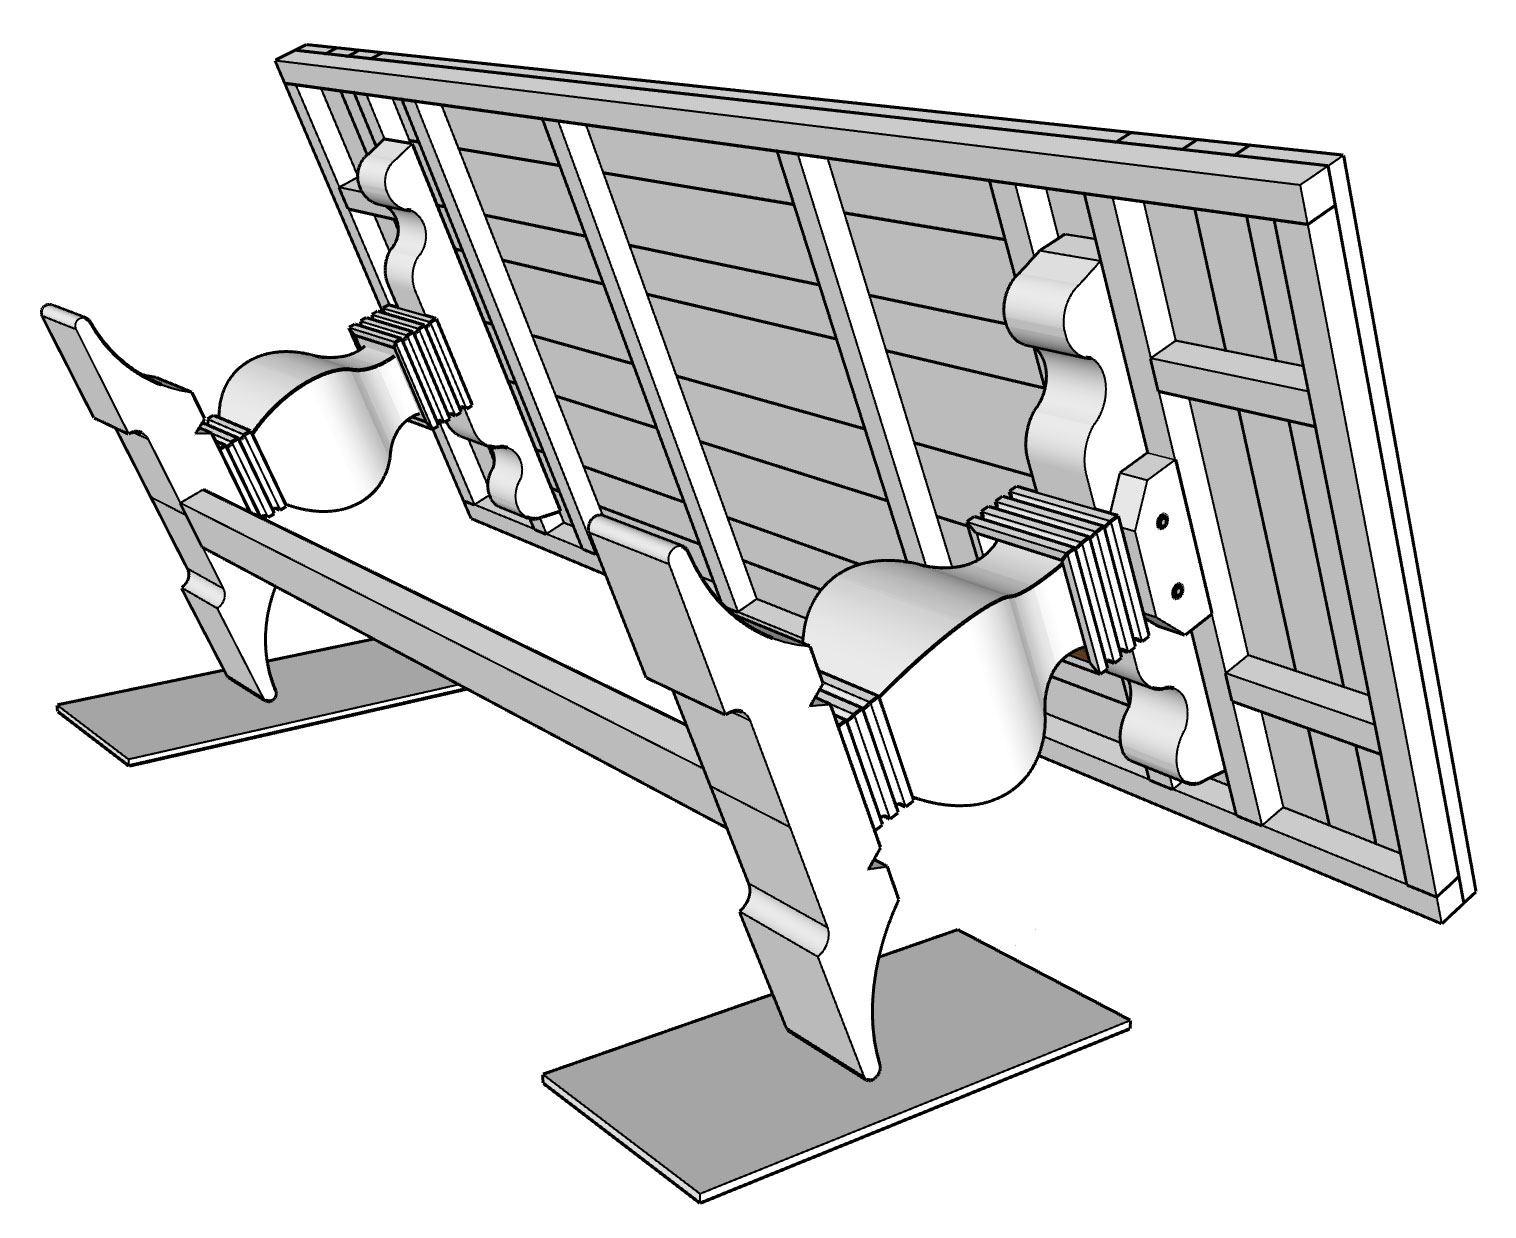
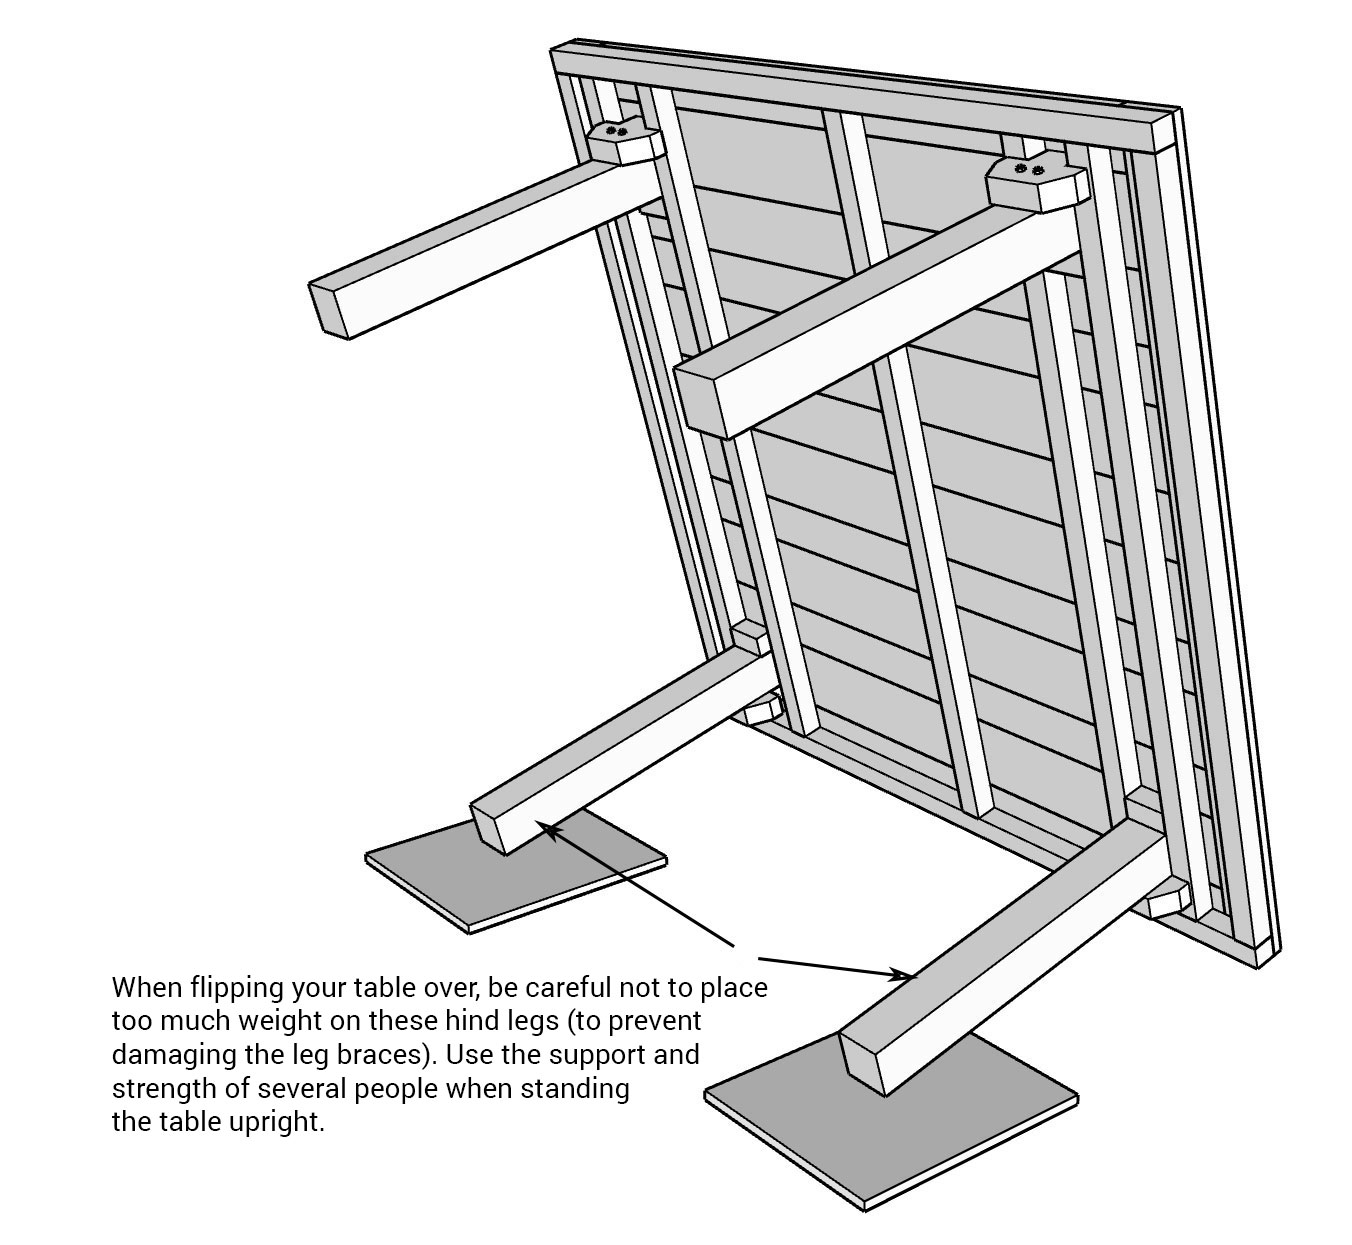
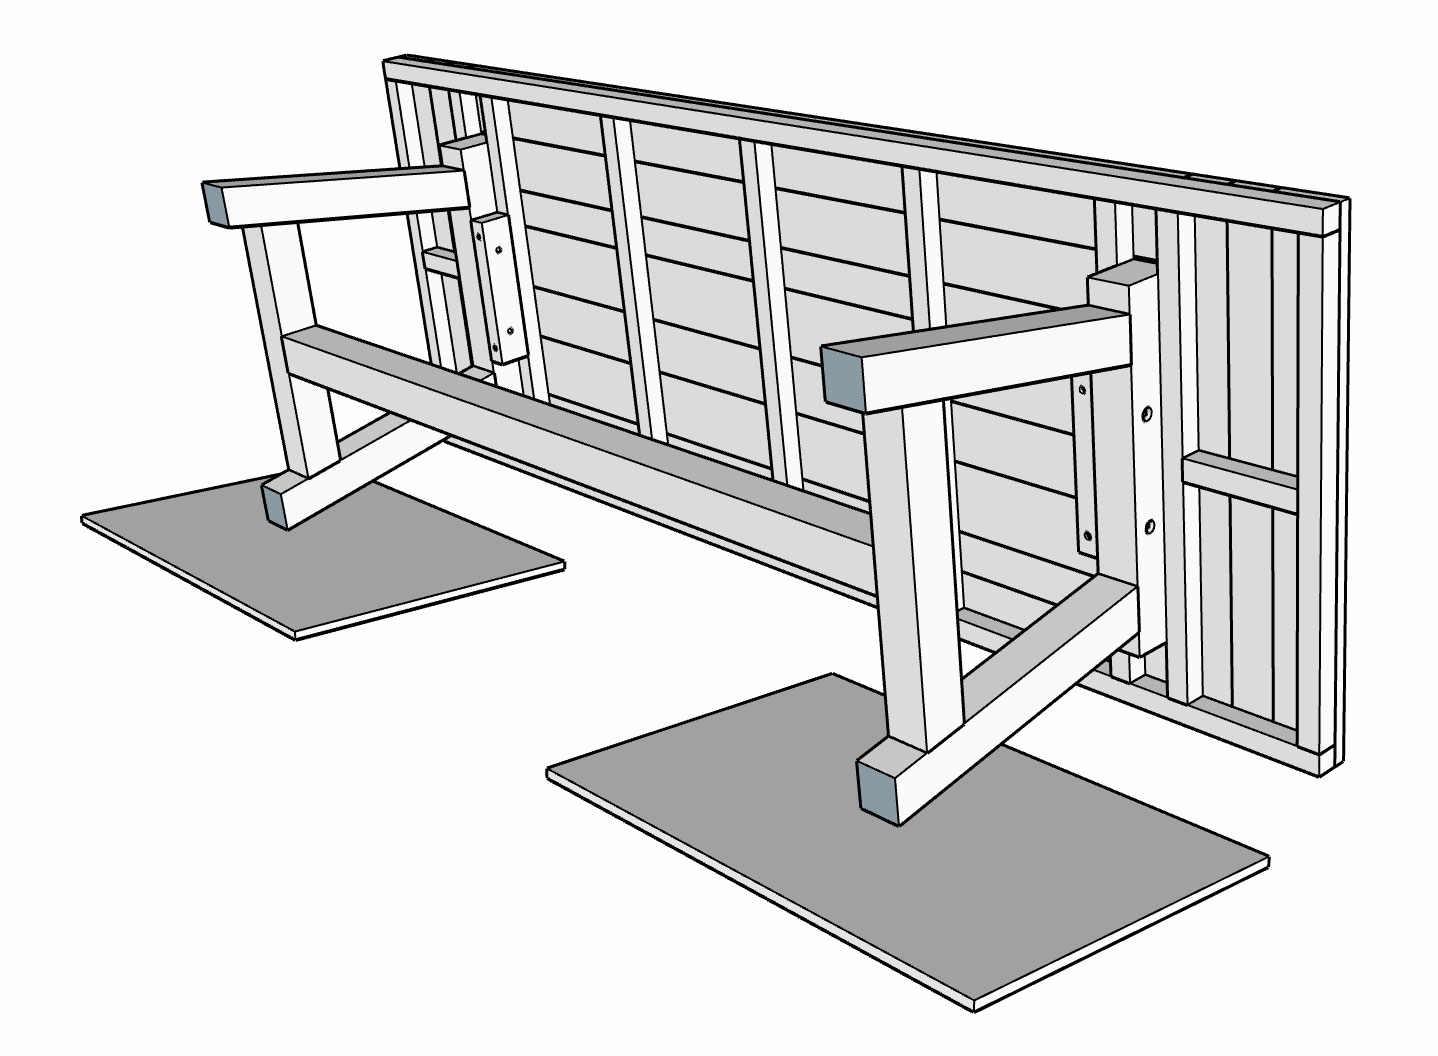
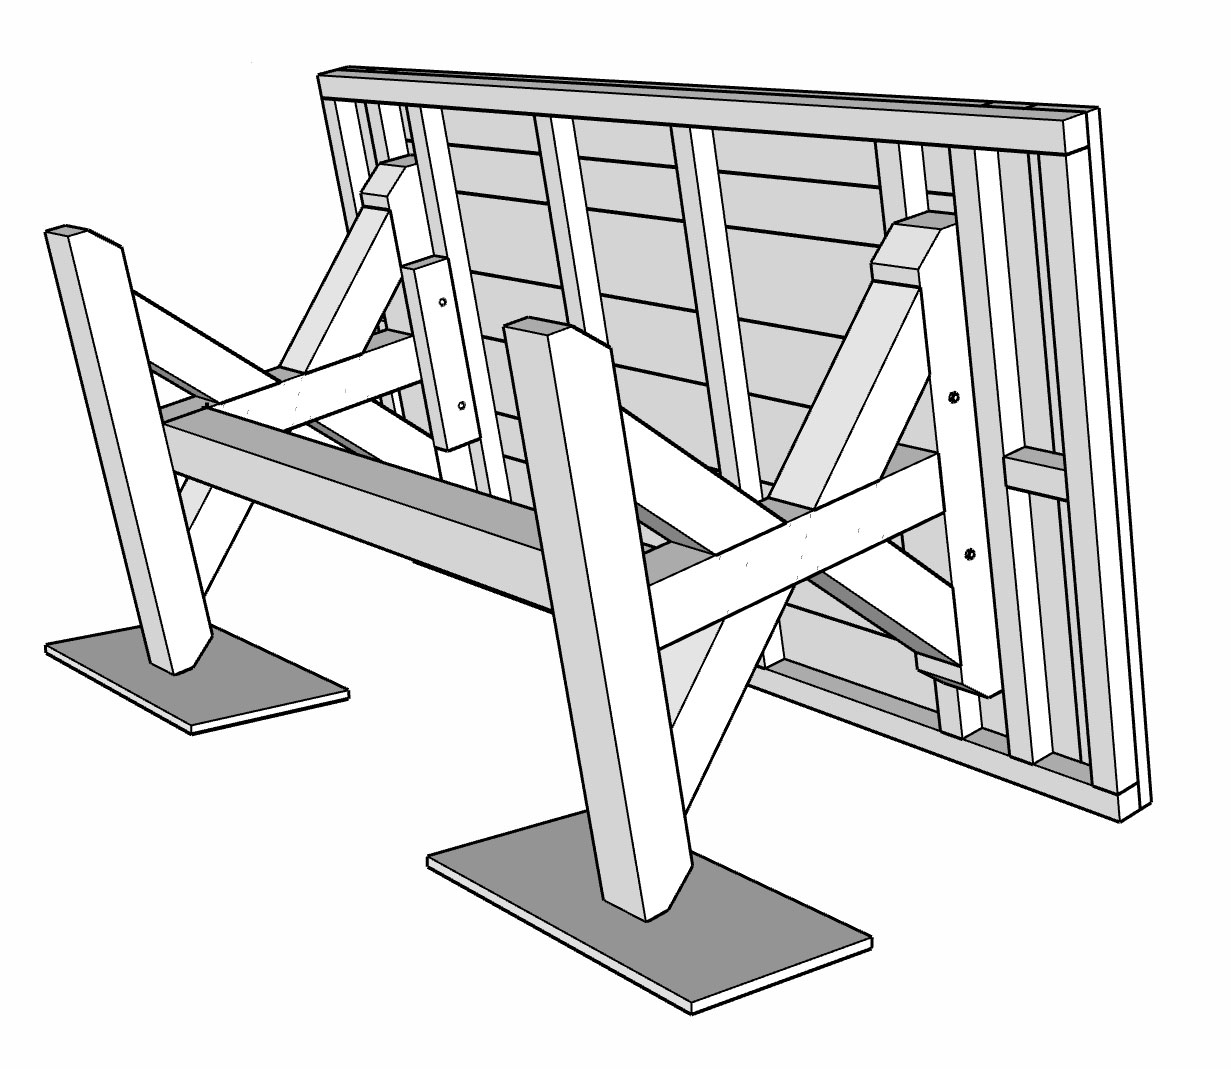
Flip your table over
Then with a person on each end, grab a hold of your table top and carefully flip your table over onto its side first, then continue to lift upright onto the floor.
Tip for flipping over your table: When the table legs are attached to your table top it is very heavy! We highly recommend placing something like a floor rug down underneath your table feet (when it is on its side before lifting upright) to prevent slipping as well as for protecting your table feet and flooring.
The Frassati Trestle
To get started you will need a 5/8" socket wrench for the bolts and 11/16" wrench (or an adjustable wrench) for the nuts. You should have four 6" bolts, washers, and nuts.
If your furniture is being shipped, you will find all your bolts for your table in a burlap pouch along with your Experience Kit (bag with logo) located inside the box labeled table hardware.
Keeping the cardboard on the table top for protection, place your top down (bottom facing up) on your floor. Then remove the protective cardboard guards on both the leg braces that you see secured by the bolts.
Furniture pieces are marked A and B
Your legs, beam and table top are marked A and B. All pieces marked A go on one side of the table and all pieces marked B go on the other.
Note: You will find the A and B markings on the top of the legs, on both beam pegs, and on the underside of your table top.
Step 1. Attach your beam between the legs
Place the legs and table top next to each other on the floor. With a person on each side holding up a table leg, lift your center beam and slide one end of the beam pegs into the leg holes. Then do the other. Make sure to hold the beam completely horizontal so that the pegs go into the holes.
Make sure the A and B markings on the beam pegs are facing up (not down) before attaching to the legs. Then hold the beam completely horizontal so that the pegs go into the leg holes.
Step 2. Lower the legs down onto your table top
Then with a person on each end, carefully lift the connected legs with beam (keeping pressure on both ends, so the beam doesn't slide off the legs) and walk over to your table top and lower both legs down at the same time.
Lower both legs down at the same time.

Step 3. Insert your bolts
Align the legs with the holes and slide in the bolts (we've added pre-marked lines to help you align the legs). On the other side add the washers and nuts. Hand tighten all the bolts first then use a 5/8" socket and wrench to tighten all the bolts.
If you find the bolts difficult to push all the way through, give them a tap with a mallet or hammer.
Flip your table on its side
Then with a person on each end, with one hand on the table top and the other on the leg, carefully flip your table over onto its side first.
Tip for flipping over your table: When the table legs are attached to your table top it is very heavy! We highly recommend placing something like a floor rug down underneath your table feet (when it is on its side before lifting upright) to prevent slipping as well as for protecting your table feet and flooring.
Lift upright onto the floor
Lastly, with a person on each end with both hands on the tabletop, continue to slowly and carefully lift your table upright onto the floor.
We've added felt pads to the bottoms of the table legs to allow for easy sliding into place as well as protection for your floors.
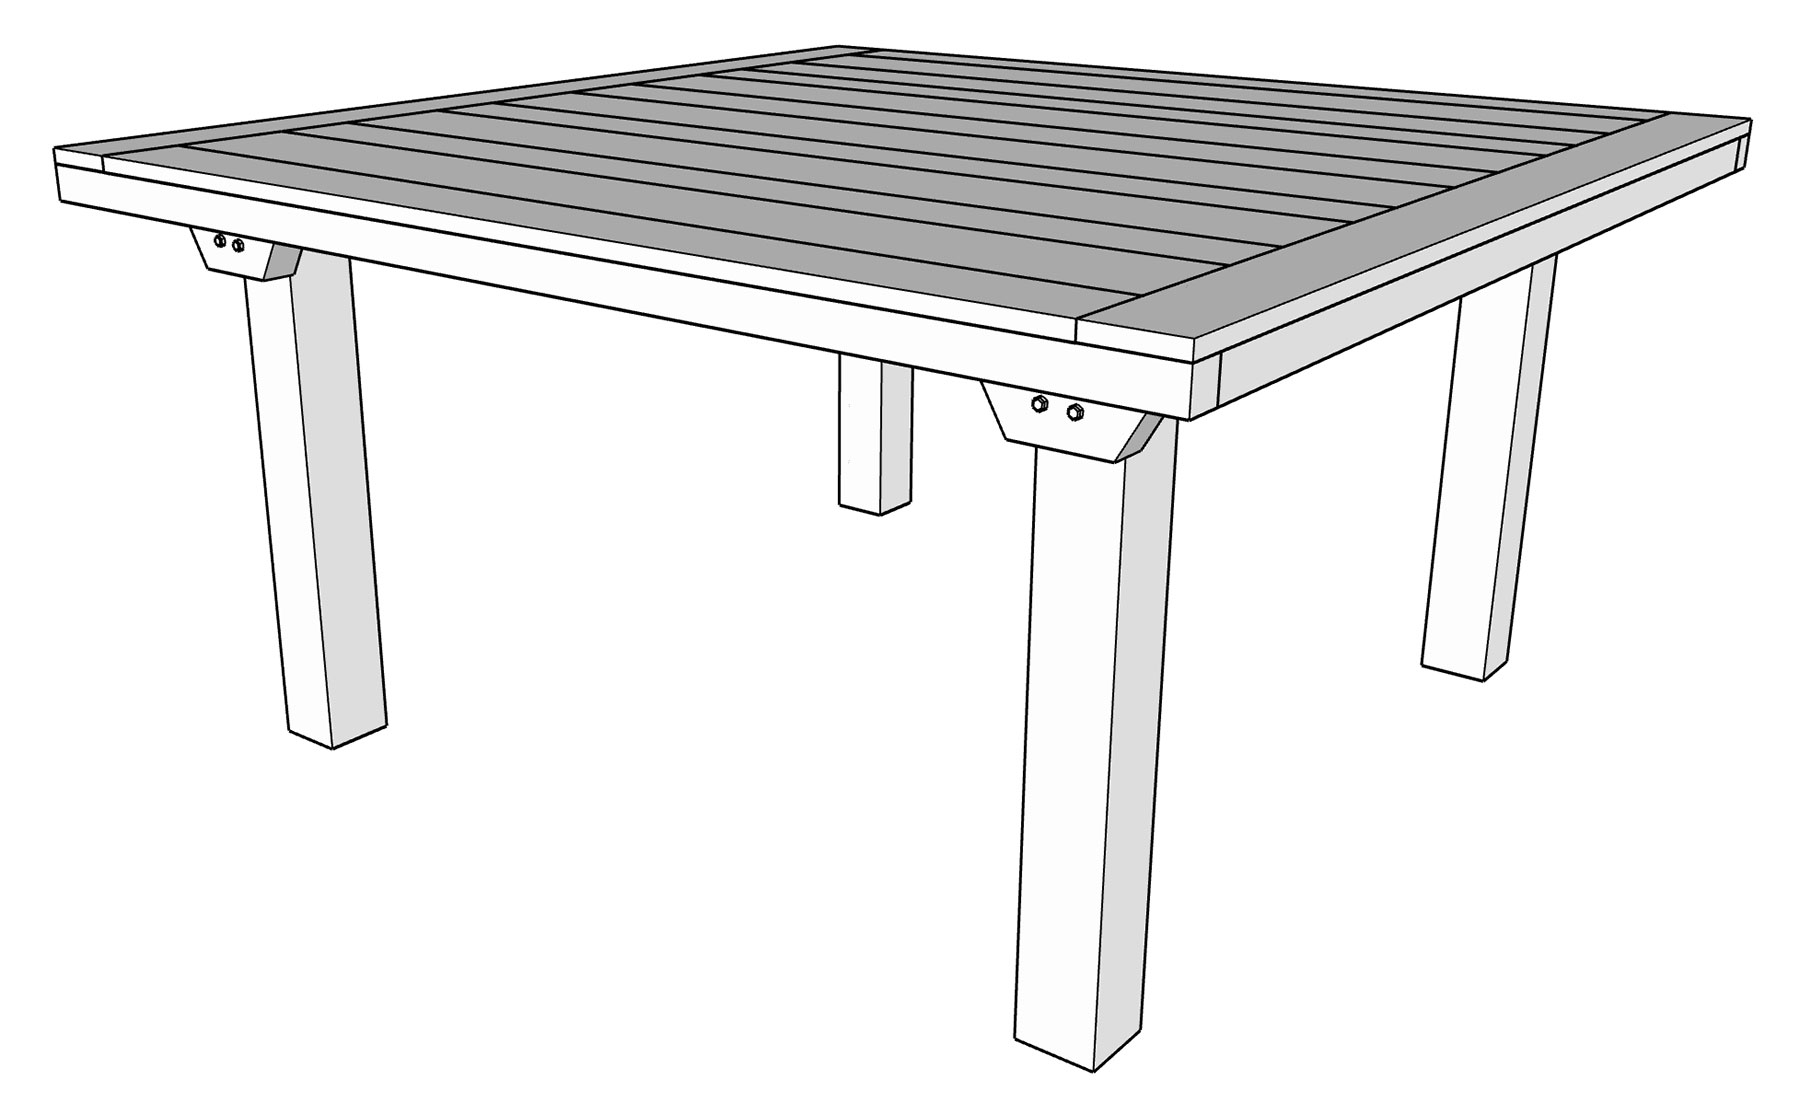
The Gemma
(Rectangle Table)
To get started you will need a 5/8" socket wrench for the bolts and 11/16" wrench (or an adjustable wrench) for the nuts. You should have eight 6" bolts, washers, and nuts.
If your furniture is being shipped, you will find all your bolts for your table in a burlap pouch along with your Experience Kit (bag with logo) located inside the box for your table legs.
While maintaining the cardboard on the tabletop for protection, position the top with its bottom facing up on the floor. Subsequently, eliminate the protective cardboard guards (if included in the shipment) from both leg braces that are fastened with bolts.
See video for your table assembly
You might experience a short delay while the video is loading up.
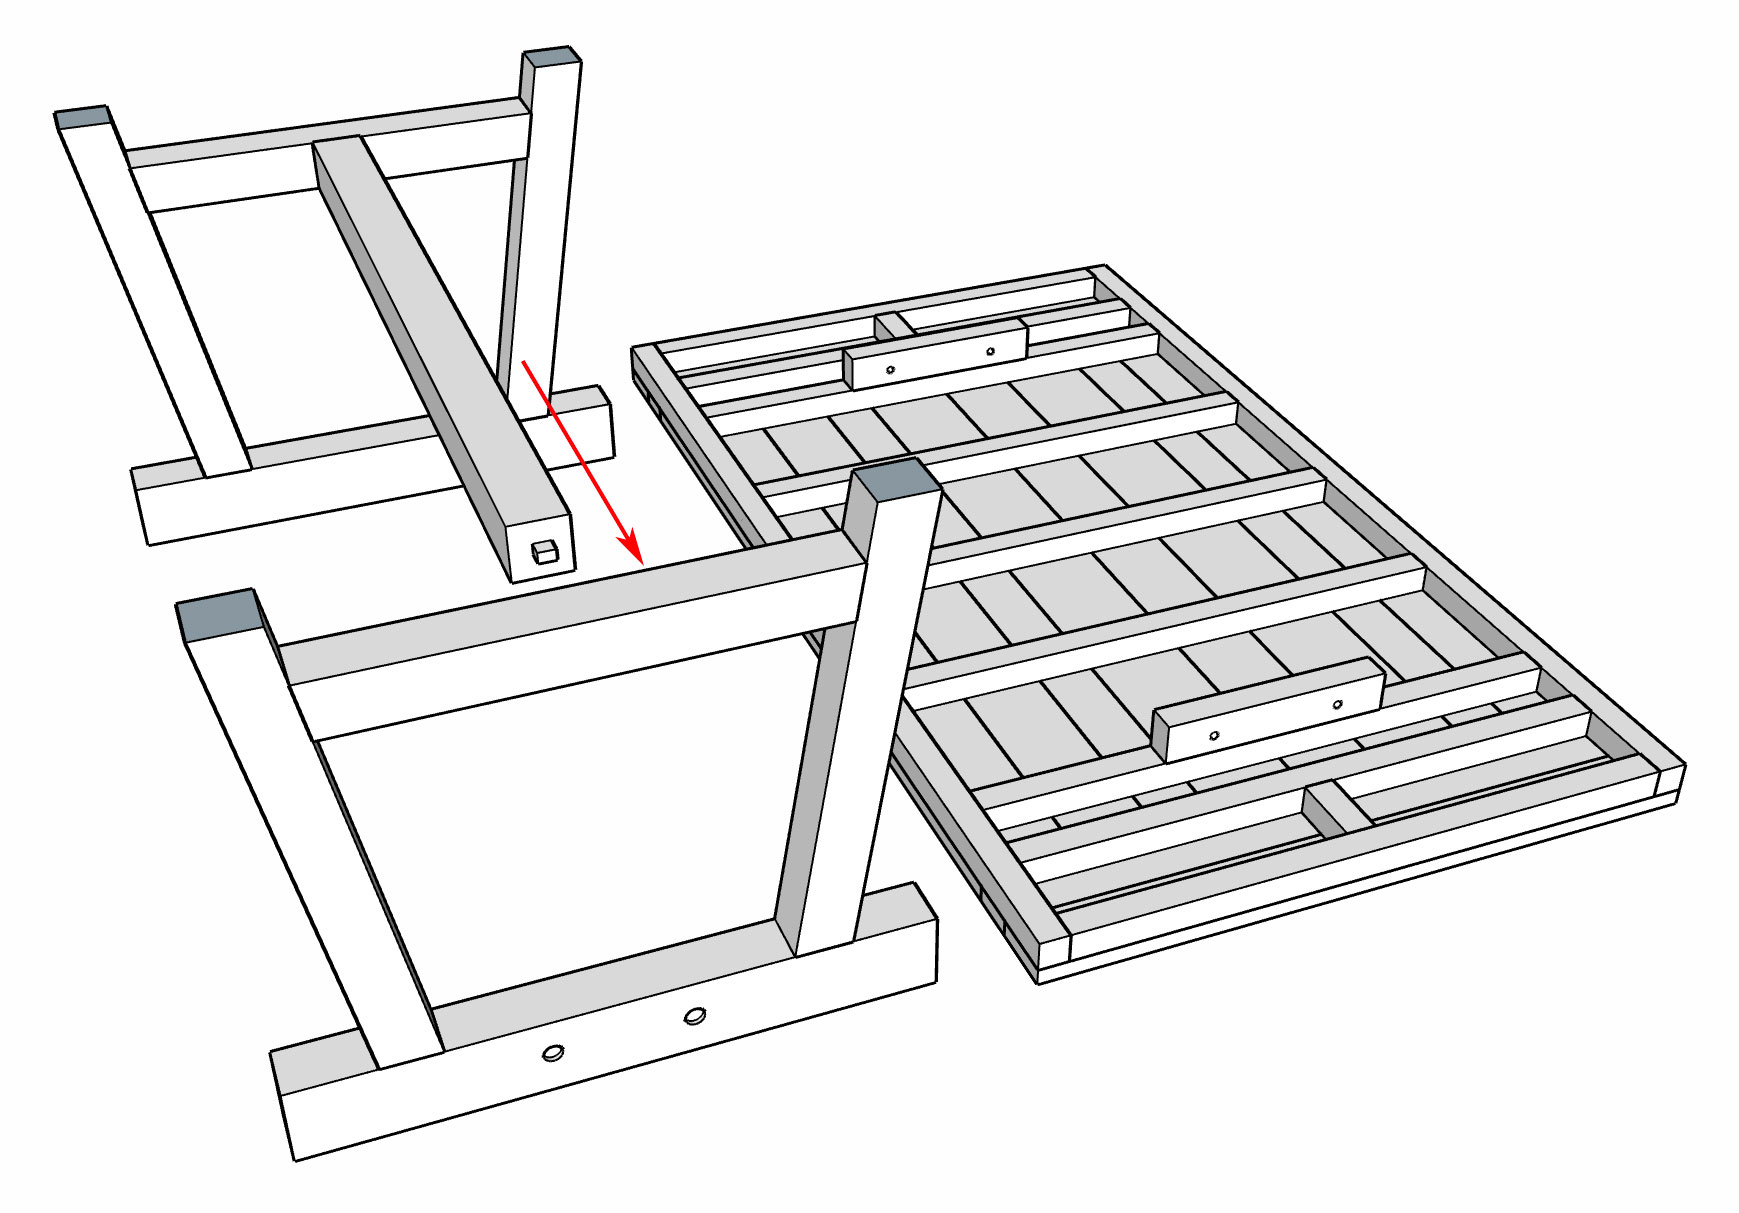
IMPORTANT: Insert the bolts through all four legs first before tightening! Then add the washers and nuts then tighten.
Flip your table over
With the legs attached and a person on each end, carefully flip your table over onto its side first, then continue to lift upright onto the floor.
Tip for flipping over your table: When the table legs are attached to your table top it is very heavy! We highly recommend placing something like a floor rug down underneath your table feet (when it is on its side before lifting upright) to prevent slipping as well as for protecting your table feet and flooring.
The Gemma
(Square Table)
To get started you will need a 5/8" socket wrench for the bolts and 11/16" wrench (or an adjustable wrench) for the nuts. You should have eight 6" bolts, washers, and nuts.
If your furniture is being shipped, you will find all your bolts for your table in a burlap pouch along with your Experience Kit (bag with logo) located inside the box for your table legs.
Keeping the cardboard on the table top for protection, place your top down (bottom facing up) on your floor. Then remove the protective cardboard guards on both the leg braces that you see secured by the bolts.
See video for your table assembly
You might experience a short delay while the video is loading up.
Flip your table over
With the legs attached and a person on each end, carefully flip your table over onto its side first, then continue to lift upright onto the floor.
Tip for flipping over your table: When the table legs are attached to your table top it is very heavy! We highly recommend placing something like a floor rug down underneath your table feet (when it is on its side before lifting upright) to prevent slipping as well as for protecting your table feet and flooring.
The Clare Trestle
To get started you will need a 5/8" socket wrench for the bolts and 11/16" wrench (or an adjustable wrench) for the nuts. You should have four 6" bolts, washers, and nuts.
If your furniture is being shipped, you will find all your bolts for your table in a burlap pouch along with your Experience Kit (bag with logo) located inside the box for your table legs.
While maintaining the cardboard on the tabletop for protection, position the top with its bottom facing up on the floor. Subsequently, eliminate the protective cardboard guards (if included in the shipment) from both leg braces that are fastened with bolts.
Furniture pieces are marked A and B
The legs, beam, and table top pieces are designated with markings A and B. Place all pieces labeled A on one side of the table, and position all pieces marked B on the opposite side.
Step 1. Attach your beam between the legs
Position the table legs and tabletop adjacent to each other on the floor. Have a person on each side, holding up a table leg. Lift the center beam, and insert one end of the beam peg into the leg hole. Repeat the process for the other leg. Ensure that you maintain the beam completely horizontal to facilitate the insertion of pegs into the holes.
Ensure that the A and B markings on the beam pegs are oriented upward before connecting them to the legs. Then, maintain the beam in a completely horizontal position to facilitate the insertion of the pegs into the leg holes.
Step 2. Lower the legs down onto your table top
Next, with an individual positioned at each end, lift the interconnected legs and beam cautiously. Apply pressure on both ends to prevent the beam from slipping off the legs. Walk over to your tabletop and simultaneously lower both legs into the slots.
Lower both legs down at the same time.
Step 3. Insert your bolts
Align the legs with the designated holes and insert the bolts (pre-marked lines are provided to assist in alignment). If necessary, use a mallet or hammer to tap certain bolts through. On the opposite side, attach the washers and nuts. Initially, hand tighten all the bolts before utilizing a 5/8" socket and wrench to securely tighten each bolt.
Flip your table over
Next, with an individual positioned at each end, grasp your table top and gently turn the table onto its side first. Then, proceed to lift it upright onto the floor.
A helpful tip for flipping over your table: When the table legs are affixed to your tabletop, it becomes quite heavy. We strongly recommend placing a floor rug or similar material underneath your table feet when it is on its side before lifting it upright. This not only prevents slipping but also provides protection for both your table feet and flooring.
The Moscati Trestle
To get started you will need a 5/8" socket wrench for the bolts and 11/16" wrench (or an adjustable wrench) for the nuts. You should have four 6" bolts, washers, and nuts.
If your furniture is being shipped, you will find all your bolts for your table in a burlap pouch along with your Experience Kit (bag with logo) located inside the box for your table legs.
Keeping the cardboard on the table top for protection, place your top down (bottom facing up) on your floor. Then remove the protective cardboard guards on both the leg braces that you see secured by the bolts.
Furniture pieces are marked A and B
Your legs, beam and table top are marked A and B. All pieces marked A go on one side of the table and all pieces marked B go on the other.
Note: You will find the A and B markings on the top of the legs, on both beam pegs, and on the underside of your table top.
Step 1. Attach your beam between the legs
Place the legs and table top next to each other on the floor. With a person on each side holding up a table leg, lift your center beam and slide one end of the beam peg into the leg hole. Then do the other. The beam must be held completely horizontal so that the pegs go into the holes. It might be a slightly tight fit so you might need to apply pressure to the side of the leg to connect the two and close any gaps.
Make sure the A and B markings on the beam pegs are facing up before attaching to the legs. Then hold the beam completely horizontal so that the pegs go into the leg holes.
Step 2. Lower the legs down onto your table top
Then with a person on each end, carefully lift the connected legs with beam (keeping pressure on both ends, so the beam doesn't slide off the legs) and walk over to your table top and lower both legs down at the same time between the slots on your table top.
Lower both legs down at the same time.
Step 3. Insert your bolts
Align the legs with the holes and slide in the bolts (we've added pre-marked lines to help you align the legs). On the other side add the washers and nuts. Hand tighten all the bolts first then use a 5/8" socket and wrench to tighten all the bolts.
Flip your table over
Then with a person on each end, grab a hold of your table top and carefully flip your table over onto its side first, then continue to lift upright onto the floor.
Tip for flipping over your table: When the table legs are attached to your table top it is very heavy! We highly recommend placing something like a floor rug down underneath your table feet (when it is on its side before lifting upright) to prevent slipping as well as for protecting your table feet and flooring.
The Moscati Pedestal
To get started you will need a drill. You should have five 2 1/2" screws (one is extra), a drill bit, and 4 hole alignment sticks.
Keeping the cardboard on the table top for protection, place your top down (bottom facing up) on your floor.
Step 1. Match the letters and align the holes
Place your pedestal base on your table top matching each side marked A, B, C, and D. With the four hole alignment sticks we've supplied, insert each stick through the pre-drilled hole in the pedestal base and into the table top frame to align the holes. The sticks will keep your table base aligned with the pre-drilled holes. See video below for more information.
Step 2. Screw in your pedestal base
Start with side A and replace the stick with a screw and drill the screw down into the base. Then do the same for sides B,C, and D. See video below for more information.
You'll be drilling through hardwood, so make sure to apply pressure on the drill as you drill down the screw through your base and into the table top.
Flip your table over
Then with a person on each end, grab a hold of your table top and carefully flip your table over onto its side first, then continue to lift upright onto the floor.
*Tip for flipping over your table: When your table base is attached to your table top it is very heavy! We highly recommend placing something like a floor rug down underneath your table feet (when it is on its side before lifting upright) to prevent slipping as well as for protecting your table feet and flooring.
The Moscati Round Pedestal
Assembly instructions in progress.